Tag Archives: Baking

Detox Butternut Squash Soup with Wheat Challah

22 Oct

Soup

We  spent the weekend in beautiful rural mid-Ohio (is that a thing?) at a really fun and beautiful wedding which took place on a farm and encouraged camping. Since we didn’t get the chance to camp this Summer we were determined to spend the night in the great outdoors, no matter how drunk it was or cold we were (guess what, sleeping outside in a non-properly set up tent during the first frost of the year on a 80% inflated air mattress ISN’T the most comfortable way to spend your night, also if you’re…um..”dehydrated”). Fast forward to Sunday morning while we’re starting our 4 hour trip back to Michigan (where everything makes sense and the speed limits don’t dip below 70!) with both our phones dead–and our souls not too far behind–and a chill deep DEEP into the bone, I knew a warm, comforting and HEALTHY meal was in order…and I knew it had to involve squash because hey, tis the season. I came across this little gem

{ Roasted Butternut Squash, Carrot, and Ginger Soup – With Style and Grace }

Well if I’m going to make soup, I need something to dip in it, right? I have been hankering for some good homemade Challah (everyone’s favorite jew-flavored bread)

{ Ima’s Challah – Food52 }

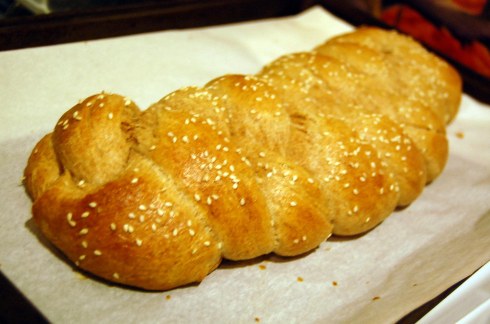
I love making bread (especially Challah) on a lazy Sunday because you start it in the morning or afternoon, forget about it for a couple hours, come back and BOOM it’s twice the size and you feel as though you have created life…LIFE! And who doesn’t like braiding dough? I used a blend of white and wheat flour (side note: I prefer wheat flour for the nice chewy texture and the health benefits, but white flour is just better for certain breads, especially when you want that silky texture, and subbing wheat for white doesn’t always translate in the recipe, I’ve learn the hard way. Anyhoo, I only had 1.5 Cups left in my white flour bag, hence the “blend”, I was nervous to say the least) and I saw some sesame seeds sitting up on the spice shelf screaming “C’MON MAN, JUST SPRINKLE ME ON TOP, C’MONNNNNN” so sprinkle I did. This yielded 2 loaves (we smashed through one of them in about an hour, so I decided it was best to give away part of the second one because no one needs a full loaf of bread in 24 hours).

The white and wheat blend of flour was PERFECT. There is a good dose of honey in the dough which lends the perfect hint of sweetness. I must say, this is one of my favorite recipes I’ve ever used for this Jew-tastic bread!

Challah


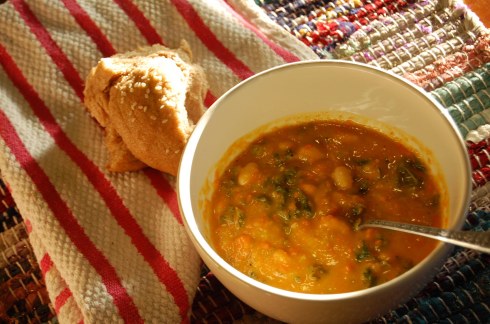
Meanwhile, while all this is happening (mainly the waiting and rising dough) make dat soup. I personally am not a fan of the overly sweet and over dairy-ed squash soups (better than saying “overly creamed”). I usually like to toss a roasted apple in, but with the ginger I decided to add a can of coconut milk to add that extra creaminess without the use of dairy. I also made the executive decision to add some braised kale and white beans for some extra “detoxiness” to the soup. I was met with delicious results.

Soup1

Inspired by { Roasted Butternut Squash, Carrot, and Ginger Soup – With Style and Grace }

  • 1 Medium Butternut Squash – Peeled, seeded and cubed (1/4″ dice)
  • 5 Large Carrots – Peeled and cubed (1/4″ dice)
  • 1 Medium Sweet Onion – Small dice
  • 5 Cloves Garlic – Minced
  • 1 “thumb” size piece Ginger – Peeled and minced
  • 1 tsp Nutmeg
  • 3 lb Vegetable Stock
  • 1 Can Light Coconut Milk
  • 1 Head Kale – chopped small
  • 1 Can white beans – drained and rinsed
  • Olive Oil
  • Salt, Pepper
  1. Preheat oven to 375
  2. Toss carrots and squash with olive oil, salt, and pepper and spread out over 2 baking sheets with tin foil. Roast for 40-45 minutes (stir and rotate pans halfway through cooking).
  3. Heat olive oil over medium heat, add onions and cook until soft (about 3 minutes), add garlic, ginger and nutmeg and cook for additional 4 minutes until onions are translucent and cooked through. Add roasted squash/carrots and vegetable stock, bring to a boil then turn down heat to simmer for 20-25 minutes uncovered.
  4. Add coconut milk to soup and use an immersion blender to blend  about 85% of the soup (I personally like a few vegetable chunks here and there, it’s up to you)
  5. Meanwhile blanche the kale in boiling water for about 3 minutes to soften and take some of the natural bitter bite out and transfer right into blended soup. Add the beans. Simmer for an additional 10 minutes until the beans are soft.


{ Ima’s Challah – Food52 }

  • 1 1/2cup warm water, divided
  • 1/4 cup plus 2 teaspoons sugar, divided
  • 1 Packet instant Yeast
  • 6 cups flour — 1.5 white, 4.5 wheat
  • 2 teaspoons salt plus more for sprinkling on crust
  • 1/4 cup mild honey, plus an extra tablespoon for eggwash, if desired
  • 2/3 cups flavorless vegetable or canola oil
  • 4 eggs, plus one yolk for eggwash, if desired
  • Sesame seeds
  1. Put 1 cup warm water in a small bowl. Add 2 teaspoons of sugar, sprinkle the yeast over top, swirl the bowl just to combine, and leave it to proof for five minutes.
  2. While yeast is proofing, mix flour, salt, 1/4 cup of sugar in a large bowl (or in the bowl of a stand mixer fitted with the paddle attachment.) Stir to incorporate or blend on low speed.
  3. In a medium bowl, mix remaining water, honey, oil, and eggs.
  4. When yeast has finished proofing, add it to the flour, immediately followed by wet ingredients. Mix with a large wooden spoon or on medium-low speed in the mixer, just until combined, about 30 seconds.
  5. Switch to dough hook and begin to knead on low speed, making sure to incorporate what’s at the bottom of the bowl if the dough hook misses it. If kneading by hand, stir using spoon until dough becomes to thick to stir. Empty dough onto well-floured surface and knead by hand. Knead dough until smooth and no longer sticky, adding flour with a light hand as needed, 7-10 minutes.
  6. Split the dough into two equal pieces. Set each in a large oiled bowl, cover both bowls with plastic wrap or a damp towel, and let rise at room temperature until doubled in size. If using white flour, this should take about 2-2.5 hours. If using white whole wheat, it will take closer to 3.5 or 4. Feel free to let the dough rise in the refrigerator overnight instead; if you do this, be sure to set out the dough in plenty of time before shaping, so it can come to room temperature.
  7. Preheat oven to 375.
  8. After the rise, the dough should be soft and pliable. Separate each mound of dough into three equal balls, for a total of six. Roll each ball into a log almost 1-foot long. Braid the logs together to create your loaf. For the nicest-looking braid, do not pinch the top edges of your logs together before braiding; simply place one log over the next and braid until you reach the bottom, then pinch those edges together. Then, flip the unfinished loaf the long way, so that the unfinished edge is now at the bottom and the loaf has been flipped over and upside down. Finish braiding and pinch these edges together. This way, both ends look identical. Tuck the very tips beneath the loaf when braiding is finished. Repeat with second loaf.
  9. Put each loaf on its own parchment-lined baking sheet. If using eggwash, mix yolk with a 1 tablespoon water and 1 tablespoon honey. Brush over loaves. Sprinkle with salt and sesame seeds.
  10. Bake at 375 degrees for 20-22 minutes, until challot are golden and baked through

Sea Salt Cocoa Brownies

19 Aug

This is how I spent my Sunday night: I had been eating BLT’s all day because that’s one of those common deliciously awesome things that I never think about, so when I finally have one I think “why not all the time” so we practically went through a full package of bacon making them with Sesame Semolina bread, Heirloom tomatoes, fresh Farmer’s Market lettuce, and fried (non fancy brand) bacon. Oh yeah, and Miracle Whip, because we had it and I like it, so save all the “how dare you not have Mayo”. After a day full of that type of food, one needs to finish it up with some as delightfully sweet for dessert (berries are tasty and in season and I love them but…c’mon, y’alls need come chocolate, amitrite). I also went through about 20 Bon Apetit magazines and pulled out all the recipes I want to make so I could recycle the discard pile with Good Will Hunting playing in the background. Matt Damon had such a 90’s hot haircut..but that is neither here nor there. Anyhoo, that’s just a long winded-way of saying “I made brownies”

So I made brownies. It’s been a little harder to cook in my kitchen as of late because of all the (please don’t judge me) fruit flies. They’re everywhere. And we even clean up everything as if we’re trying to pass military-grade bunk inspection. You call this a clean cutting board?! Get on your knees and clean this apartment with your TOOTHBRUSH. After weeks of luring these nightmare-inducing beings wrapped in teeny tiny packages into glasses of wine and/or orange juice (wrap the glass in saran wrap and poke a small hole in it…they can’t get out and drown…aaaahahaha). However, we’ve been losing the battle lately…until we got some great information from our good friend Internet, and learned that a glass full of 1 part apple cider vinegar and 1 part dish soap (no need to saran wrap) was just the thing to clear these bad boys out. And it worked in about 15 minutes, it was INSANE. I was going to post pictures, but then I thought it’s best not to show a bunch of dead (but dish-soap-clean) fruit flies suspended in amber liquid. So, armed with a fly-less kitchen, I got to work.

Brownie

{ Best Cocoa Brownies – Smitten Kitchen }

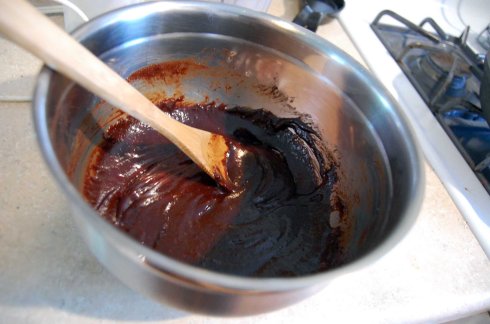
Combine butter, sugar, and cocoa powder in a double boiler situation (or just put them all in a bowl and put them directly in simmering water because you already had that pan out)

DoubleBoiler


Give it a good stir until everything is all melted. Take off heat and allow to cool slightly. Beat in 2 eggs, one at a time, until it’s glossy enough to check your hair, and see that you may have bacon grease on your face from that afternoon’s BLT.

Glossy


Now beat in some flour and vanilla. Once it’s nice and incorporated DO NOT STOP MIXING, continue to mix for a good 40 lashes….er, strokes until you’re so positive there is nothing that is NOT incorporated. Now pour your lovely mixture into a parchment lined 8 x 8 baking pan. Now get crazy and add some big ol’ flakes of sea salt to the top because you KNOW that going to be good.

Parchment

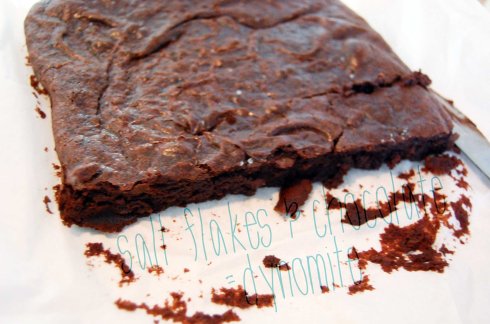
And bake for 20-25 min at 325. Let cool and easily lift out of pan with parchment paper (holy crap it’s clean), and try not to eat it all

Brownie


So, needless to say these brownies were really easy to make. And I just found out they freeze well, so I’m happy to say that Diabetes will NOT be in my immediate future!

Adapted from { Best Cocoa Brownies – Smitten Kitchen }

  • 8 Tbs (1 stick) unsalted butter
  • 1 1/4 C sugar
  • 3/4 C + 2 Tbs unsweetened cocoa powder
  • 1/4 tsp salt
  • 1 tsp vanilla extract
  • 2 large eggs
  • 1/2 C all-purpose flour
  • A few pinches of large flaked sea salt
  1. Preheat the oven to 325°F. Line a 8×8 baking pan with parchment paper.
  2. Combine the butter, sugar, cocoa, and salt in a saucepan of simmering water. Stir until butter is melted and mixture is smooth. Take off heat and allow to cool.
  3. Stir in the vanilla, add the eggs one at a time, stirring vigorously [vigorously] after each one. When the batter looks thick, shiny, and well blended, add the flour and stir until you cannot see it any longer, then go crazy for 40 more strokes.
  4. Bake until knife comes out clean (about 20 to 25 minutes). Lift out with parchment and enjoy!

Guest Post: Why is there no bread here? A rant.

24 Jun


Ed note: A kindly fellow blogger, The Winegetter, approached me about doing an exchange of posts this summer, as he and his wife will be traveling throughout SouthEast Asia for 2 months and he wants to keep his blog updated with original content. I promised him a post if he promised to expand on a topic that he brought up the first time we met: why there is no good bread in the US. Let me back up: he’s German. There, now all of your questions have been answered. 

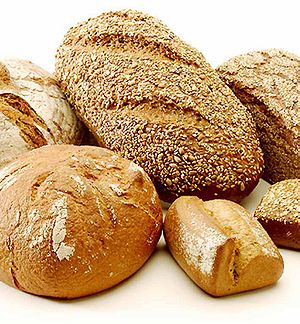
bread

My wife says the easiest way to identify two Germans anywhere in the world is by listening to their first five minutes of conversation. Because, according to her, they will –100% guaranteed – complain to each other about how bad the bread is wherever they are and ask whether the other has found at least “decent” – or palatable – bread in the vicinity.

I tended to dismiss her assessment until I realized it is true. I do that. I really wouldn’t want to have to do that, but I have to do that. As a German, you grow up in bread heaven. Seriously. If you never lived in Germany, you have no idea. But if you grew up there, the smell of fresh bread is surrounding you, the variety of breads – and dinner rolls – is overwhelming and all of it is fresh, affordable, and – most of them – have a hard crust and a soft core. And no other country seems to get that right. Especially not America, where softness seems to be the key characteristic for bread.

Now, some bakeries here in and around Ann Arbor try. With the emphasis on try. Zingermans? Don’t get me started: Overprized, dried out bread that wants to be German so badly, but let me say it loud and clear: A dried out bread is not bread. Avalon? They actually do a decent job on their baguette, but then again, that is not really a bread, it is a baguette. Others? Not really. I buy fresh multigrain bread from Costco, which is still too squishy, but it is close enough…which I say with a sigh. Is that sad and pathetic? Yes.

Sigh.

Let me walk you through my random German bakery to give you an idea why I am so upset. You enter and are greeted by the danishes, croissants and other sweet stuff in the glass box that forms the counter. There are cakes, from streusel to plum pies, from strawberry tartes to serious cheesecake. There are croissants for under 1 euro ($1.30 – and I am talking actual, real fluffy yet rich croissants, not the Zingerman’s hard-as-a-rock-and-outrageously-priced-at-$3.50-crap. $3.50 for a “croissant”???? Seriously? They’re out of their minds…but then again, a look at their cheese prices is proof enough for that…sorry, I really really dislike Zingerman’s).

Photo from one of the branches of the bakery I am talking about:

geschaefte-12812-10


Behind the salespeople is what I am really looking for: the bread rack. The bakery I used to go to in Germany had about 35 different breads on its bread rack. 35. Seriously. And they were all different: from sunflower seed to pumpkin seed, from rye to multigrain, from baguette to ciabatta, from whole wheat to superdark full grain….the choice was awesome. And for a loaf of bread, you ended up paying around 2.50 euros to 3 euros ($3.20 – $3.90). Best of all, they had one featured bread of the week which would sell for 1.99 euros. Try to get a bread that is half-way decent in this country for under $5. Impossible.

If you have never been to Germany, you really cannot understand what I am talking about. But ask your friends that visited friends in Germany, and you will usually hear them talk about how good dinner and breakfast was, and that usually involves bread. Real bread.

Oh, and by the way: The German breadmaker’s association is currently putting together a registry of bread types in Germany, in an attempt to apply for World Cultural Heritage status…that is how serious we take this shit. (For the curious: Apparently, there are over 300 distinct different types of bread in Germany)

1616074680-handwerk-baecker-brot-BHUgYVwRI34


As you see, bread matters to us. But there is a big reason for that: We tend to have it twice a day; for breakfast and dinner. Not as a side, but as the hidden star of the dish. The big meal in Germany traditionally is lunch, and dinner is a meal of cheese and cold cuts and bread. While a lot of Germans are switching up their routines and tend to have more warm dinners, my wife and I still managed at least two to three traditional dinners each week. If the bread sucks, that meal sucks. If you just want to scrape up your premade tomato sauce, I guess soggy crap is just fine…

My biggest issue with American bread? Most of it is squooshy and soggy. Even the “harder” crusts tend to be too soggy, too soft, too mweh, too blurb. I am lacking words, I am making disinterested, bored sounds with my mouth. The country that has a reputation for producing bland, boring bread in Europe is the Netherlands. Why is the only thing American culture incorporated from Dutch culture one of the worst cultures in the Netherlands? I don’t get it.

And don’t forget the other cardinal sin: Most American breads are too sweet. This country’s obsession with sugar (or corn-syrup) has led to an oversweetening of many products. Where it hurts the most, for me, is in bread. Bread should not taste sweet when you try it. It is not a dessert!

Germany is lamenting the decline of its bakery land of plenty, but let me assure you: It is still leaps and bounds away from pretty much anywhere else…yes, there is more and more supermarket and frozen bread sold, but there still are plenty of good bakeries providing quality products at fair prices…

So what do we Germans abroad do? We resort to tricks. A friend of mine brings German bread-flour mixes from Germany every time he goes and then bakes his own bread. I hate baking, and even bread does not get me to make it. Also, I wouldn’t know where to find a proper recipe. Because bakery bread is actually superior to most homemade breads in my opinion. It might be the ovens, I don’t know.

Another option is to get lucky and find a guy who makes proper bread. And then we are willing to pay even a fortune. I am going out of my way to try breads here that look promising, but I often end up let down. So, all that is left to me is binge when I am back home and that is not nearly often enough. It is a sad state of affairs…probably, along with affordable stellar Rieslings, the biggest prize I paid for leaving Germany.

Sigh.

A Feast of Berries and Nice: Pt 2

13 Jun

And our Strawberry extravaganza continues…

Final1

You know what my big dilemma is when it comes to Summer? The Farmer’s Market is brimming with all sorts of tasty delights, and it’s literally a 10 minute walk from my house. However, this is also the time where there are about 10,000 fun and exciting things to do every weekend, and many of them involve me traveling (weddings, festivals, concerts, lakes, beer excursions, etc) over the weekend. Needless to say, I’m having Farmer’s Market guilt since I haven’t been able to take much advantage of the bounty held mere blocks from my house. However, I was still able to pair this with my delightful produce-packed meal last week (and it even coincided with the Red Wedding during Game of Thrones, who could have matched that up so perfectly??).

So, without further ado, I present to you the second Strawberry-inspired post this month:

Strawberry Jam Biscuits – Yvette Van Boven }

You know what stresses me out about that title? Biscuits. Fellow blogger The Food and Wine Hedonist recently posted about why baking is a lot more stress-inducing than cooking, and I couldn’t agree more. Any time I’ve made scones on here I feel like I go into an hour-long rant about over-mixing and blah blah blah, but you know what? Over-mixing and blah blah blah! You know what’s worse than throwing away something you’ve spent minutes (and possibly hours) creating? Remembering that you also spent money on all the ingredients. Yes, baking ingredients are traditionally relatively cheap (flour, sugar, baking powder/soda, salt, water), but remember, I’m the type of gal that will stop mid-run to pick up pennies. And when I don’t have a pocket in my shorts, I’ll carry that red cent all the way home, and triumphantly announce said money to anyone in the near vicinity.

Sidenote: one time at a movie theatre John, my sister Jessica and I were waiting in line to get tickets. Jessica and I both locked eyes on a nickel that was on the ground about 2 feet away from us and started a mad dash to be the first to pick it up. Before either of us could get our grubby fingers on it, John took a casual side step to conceal the five cent piece under his foot. He then gave us a “are you seriously competing for a nickel” glare. He just doesn’t get it. But suddenly something happened, the ticket counter person was calling “next in line” which was us. What to do. We each paused for an uncomfortably long time, hoping John would remove his shoe from our monetary prize before we could purchase our tickets. Alas, he firmly stood his ground, and we had to make the heroic decision to go purchase our tickets to continue the flow of movie traffic. That was 3 years ago. I still often think about what could have been… So yes, I’m cheap, that’s what I’m getting at.

With the weight of messing up these biscuits on the shoulders, I decided to embark on this project, just to prove to myself I could do it. I started with the non-baking portion first: home made jam.

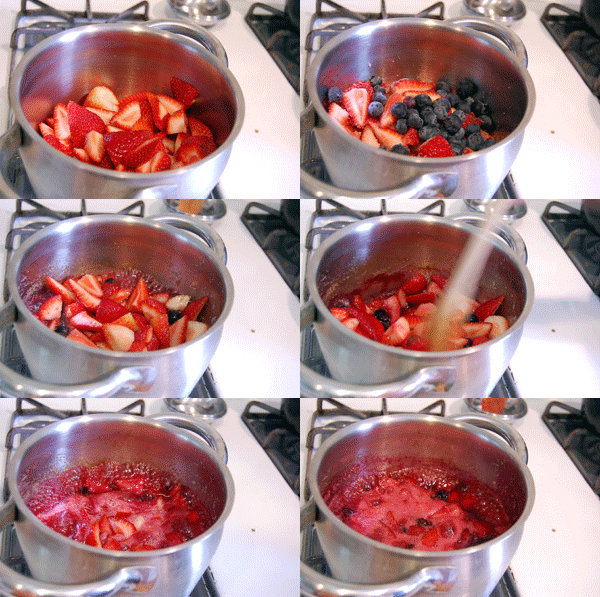
Jamm


Well, I’m never buying jam again, this is so easy, tasty, and idiot proof, it’s crazy. You take strawberries and sugar, cook them for about 12 minutes, then stir in some lime zest and lime juice. Boom, you’ve been jammed. I decided to add some blueberries to the mix since I had them and I like questioning authority, man.

While letting your jam cool, take a deep breath and start your biscuits. CAREFULLY mix/sift your dry ingredients together (flour, sugar, baking powder, salt) and then add some lime zest and PRECISELY cut chilled butter cubes

ButterLime


Here’s the tricky part: use your fingertips to mix the butter into the dry ingredients, but DON’T over mix it. It needs to be like a coarse, sandy texture. Don’t stress out though, I mean, it’s not like if you over-mix it you can’t go back and fix it…oh wait.

BiscuitMix

There’s something kind of vulgar about that .gif isn’t there?

Now add your buttermilk, and mix with a fork until the dough resembles something “shaggy” looking

Dought

Oh my god, that doesn’t look shaggy. What have I done!? Now the fun part (if you haven’t had a panic attack yet): roll out GENTLY and cut your biscuit circles with an inverted glass

GlassCut


Put your little deflated circles on a baking sheet, give them a good thumbing in the middle and a heavy-handed sprinkle of sugar. It’s Jam time.

Jamming


Don’t let the false hope fill you up while these are baking, because your home will smell AMAZING during the 18-22 minutes these are baking. Moment of truth time:

Biscuits


I don’t think it’s possible for me to have a shot without some type of beer in the background. Hmm.

So as you can see, they look DELIGHTFUL, however, not puffy and flaky like a biscuit should be. I hereby change the name of these to Strawberry Jam COOKIES, because these things are sweet, tasty, and very satisfying. Just not….biscuity.

Final


And I’m sorry about all the animated pictures. I’m one step away from 90s chic with the tail that forms on your cursor when you navigate around the site, or, you know, I could go with the classic toaster with wings…


Strawberry Jam Biscuits – Yvette Van Boven via Bon Appetit }

Strawberry Jam

  • 12 ounces fresh strawberries, hulled, halved or quartered if large (about 3 cups)
  • 1/4 cup sugar
  • 1 tablespoon finely grated lime zest
  • 2 tablespoons fresh lime juice
  1. Cook strawberries and sugar in a medium saucepan over medium-high heat, stirring occasionally, until jamlike in consistency, 12–15 minutes. Remove from heat; stir in lime zest and juice. Pour into a shallow bowl and let cool.

Biscuits

  • 3/4 cup sugar
  • 2 teaspoons baking powder
  • 3/4 teaspoon kosher salt
  • 2 1/4 cups all-purpose flour plus more
  • 1/2 cup (1 stick) chilled unsalted butter, cut into 1/2-inch pieces
  • 1 teaspoon finely grated lime zest
  • 3/4 cup buttermilk
  • 1 large egg, beaten to blend
  • 1 tablespoon raw sugar
  • Vanilla ice cream (for serving)
  1. Preheat oven to 400°. Whisk sugar, baking powder, salt, and 2 1/4 cups flour in a large bowl. Add butter and lime zest and blend with your fingertips until coarse crumbs form. Add buttermilk and, using a fork, mix until just combined. Transfer to a lightly floured surface. Gently knead just until a shaggy, moist dough forms, about 4 times.
  2. Roll out dough about 1/2-inch thick. Using a 2 1/2-inch biscuit cutter or inverted glass, cut out rounds. Gather scraps and repeat rolling and cutting until all dough is used.
  3. Place biscuits on a parchment-lined baking sheet. Using your thumb, make a large divot in the center of each biscuit; brush with egg and sprinkle liberally with raw sugar. Spoon a scant 1 teaspoon strawberry jam into each divot.
  4. Bake biscuits until golden brown, 18–22 minutes. Serve warm with vanilla ice cream, if using, and remaining jam.


Carrot Muffins with Brown Butter and Currants

2 May

This is quite the departure from the last batch of carrot muffins I made which used no sugar and lots of healthy and life lengthening ingredients (I ate some dates, I’m going to live forever). It was a rainy Sunday and I was “tried” from the weekend’s events, there was only one thing to do: Bake. There is nothing better than  an afternoon of baking to finish up the weekend, especially if it’s raining. So grabbed (another) new cookbook I was able to get my greedy little hands on and saw a muffin recipe I couldn’t pass up. And wouldn’t you know it, the full recipe is happily available online (thanks NPR!)

{ Carrot Muffins with Brown Butter and CurrantsThe Dahlia Bakery Cookbook by Tom Douglas }

nowenteringflavorcountry

Now this is a real-deal baking recipe (sorry for the Guy Fieri verbiage) that calls for eggs AT ROOM TEMPERATURE, and butter THAT HAS BEEN BROWNED,  flour THROUGHLY SIFTED, and carrots THAT NEED GRATING. Was I up for the challenge? You bet you ass I was. And besides, the alternative was watch a full season of Arrested Development throughout the day, which let’s just say is not a foreign activity in our household on the weekends.

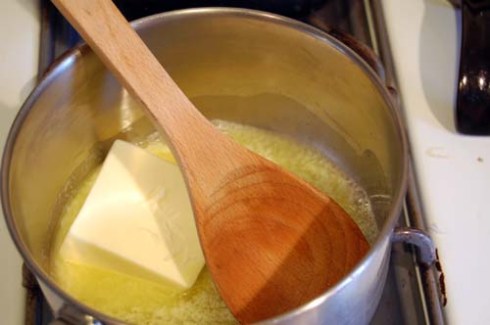
So what is browned butter exactly? It’s unsalted butter that is put over low heat for some time to allow the butterfat and milk solids to separate. Once this occurs the milk solids will start to turn a delicious brown color as they begin to toast from the heat.

nowenteringflavorcountry

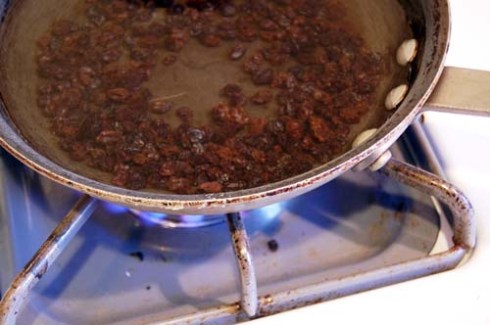
ButterBoilIt also smells amazing. While this is happening, you want to take some dried currants and re-hydrate them in boiling water

CurrantsAnd might I add, I just love currants. I’m a fan of raisins as well, but no matter what, the flavor of raisins will always elicit a vivid sense memory of how much I used to hate them as a kid. I don’t have that with anything else. Just raisins. Babysteps. Drain these, and let cool down to room temp, along with your newly browned butter, and your eggs. Now is a good time to squeeze in some episodes…or work your way through your growing pile of New Yorkers because why do they come so fast.


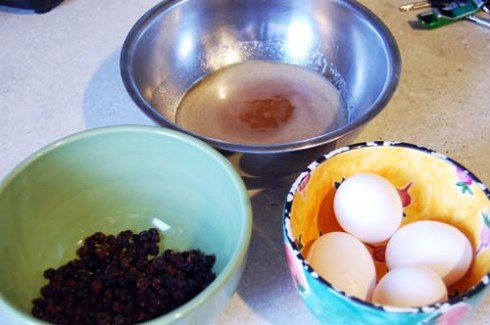
nowenteringflavorcountryBeat [room temperature] eggs, sugar, orange zest, vanilla, and salt until fluffy. Now, we don’t simply mix, but we layer the carrots, currants, and sifted flour mixture (which is just flour, baking powder, cinnamon, and ginger), and gently fold them together. I used about half the amount of carrots needed for this because I was (again) using baby carrots, and kept grating myself when I got close to the nubs. Will I ever learn? Probably not.

nowenteringflavorcountryBut Erica, what about the browned butter? I thought you’d never ask. Once you have your gently folded batter, you tenderly massage the browned butter in with a caring spatula.

nowenteringflavorcountryOnce mixed, tenderly schlop your batter into prepared muffin tins. Now here’s my favorite part: top with sugar AND a pinch of salt. GENIUS! Why have I never thought of that before. You get a nice sugary top with a little caramelized crunch, and you have that added flavor complexity with the salt…OH it’s just too much, I love it! My new secret weapon.

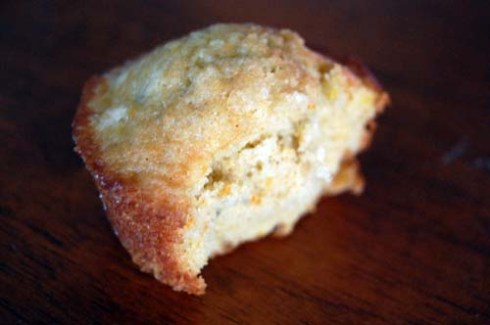
nowenteringflavorcountry…this is where I stopped taking pictures. Why? Because by the time they had cooled enough for me to handle (enough to take a picture at least) I was settled on the couch, ready to get my lethargy on. And what makes this worse is I didn’t even realize it until THE NEXT DAY. So here I have a half eaten, day old muffin, and some of its associates in a glass prison I like to call my baked goods jar.

nowenteringflavorcountry


nowenteringflavorcountryIf you look closely, you can barely see any carrots….

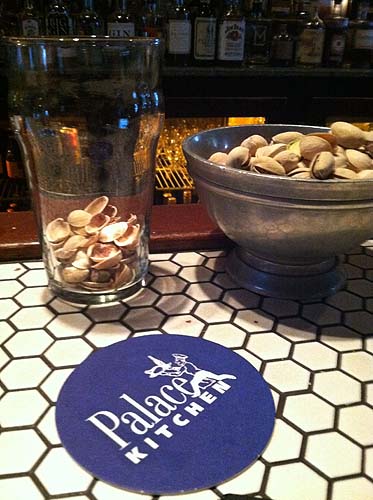
On an unrelated note, John and I were in Seattle over the Summer, and we had the pleasure of dining at one of Tom Douglas’ restaurants, Palace Kitchen. Of course I only had my phone with me, so all the pictures are horrible, but it was absolutely delicious. One of the (if not “The”) best meals I’ve ever had. You could actually taste the love. We never got a chance to make it to the Dahlia Bakery while we were there, but they did feature some of the baked goods at the restaurant.

nowenteringflavorcountry


Carrot Muffins with Brown Butter and Currants – The Dahlia Bakery Cookbook by Tom Douglas }

  • 1 cup (2 sticks/8 ounces/227 grams) unsalted butter
  • 1⁄2 cup (2 ounces/60 grams) dried currants
  • 1⁄2 cup (4 ounces/115 grams) water
  • 13 ⁄4 cups (10 ounces/285 grams) all purpose flour
  • 2 teaspoons baking powder
  • 3 ⁄4 teaspoon ground cinnamon
  • 3 ⁄4 teaspoon ground ginger
  • 4 large eggs at room temperature (see “how to Bring ingredients to room temperature,” page 12)
  • 1 cup (7 ounces/200 grams) granulated sugar
  • 1 1⁄2 teaspoons grated orange zest
  • 2 teaspoons pure vanilla extract
  • 3 ⁄4 teaspoon kosher salt
  • 1 cup (5 ounces/142 grams/about
  • 2 medium) peeled and grated carrot (use the largest holes of a box grater)
  • raw (turbinado), granulated, or crystal sugar and kosher salt as needed for sprinkling
  1. Preheat the oven to 375°F. Line the muffin pan with paper liners and set aside.
  2. To make the brown butter, place the butter in a small saucepan over medium- high heat and cook until the butter solids are browned and smell toasty, stirring constantly, about 3 minutes or a little longer. Watch carefully so the butter does not burn. As the butter browns, the foam rises to the top and dark brown particles stick to the bottom of the pan. As soon as the butter is dark golden brown, pour it into a small bowl and set aside to cool to room temperature. (You can put the bowl in the refrigerator to cool more quickly, but do not let the butter solidify.)
  3. Combine the currants with the water in a small saucepan and bring to a simmer over medium high heat. Simmer until the currants are plump, about 10 minutes. Remove the currants from the heat, drain, and transfer to a small bowl to cool to room temperature.
  4. Into a bowl, sift the flour, baking powder, cinnamon, and ginger together twice, then set the dry ingredients aside (see “How to Sift,” page 13).
  5. In the bowl of an electric mixer, combine the eggs, sugar, orange zest, vanilla, and salt. Using the whisk attachment, whip on medium- high speed until thick and pale, about 3 minutes. The egg mixture should begin to “ribbon” but not hold the ribbon. (In other words, when you lift the whisk, you will start to see a ribbon forming, but it will dissipate quickly.)
  6. Remove the bowl from the mixer. Without stirring, place the carrots and currants on top of the egg mixture. Then pour the dry ingredients on top and, using a rubber spatula, gently fold everything together. Finally, fold in the browned butter, combining everything thoroughly but gently.
  7. Scoop the muffins into the paper- lined muffin cups, dividing it evenly, using about 3 ounces, or about 1 ⁄3 cup, of batter per muffin (see “How to Scoop Muffins, Cookies, and Cupcakes,” page 74).
  8. Lightly sprinkle about 1 ⁄4 teaspoon raw sugar and a pinch of kosher salt on top of each muffin. Bake until the muffins are cooked through and golden, about 18 minutes, rotating the pan once halfway through the baking time. A wooden skewer inserted into a muffin should come out with a few crumbs clinging but no batter.
  9. Remove the pan from the oven and cool on a wire rack about 10 minutes before unmolding.

Lemon-Rosemary Scented Scones

25 Apr


There is nothing better than a good scone, emirite? I explored this topic a bit back in September and voiced my concerns regarding the baked and fluffy arts (over/under mixing). The trick to a good scone or biscuit is not over mixing the butter and flour mixture because it’s those bigger chunks of butter spread throughout the dough that creates the delicious layered fluffy goodness that you want in said pastry. Well, unfortunately I have not mastered the proper mixing consistency, however I am starting to get more confident.

With that said, not only do I like a good scone, I LOVE a good savory scone. Cheddar dill? Yes please! Keeping this in mind, I came across the following recipe and knew I had to have it inside of me:

{ Lemon-Rosemary scented Scones from Ancient Grains for Modern Meals by Maria Speck } which I know I’ve talked about before, and it really is one of my most cherished cook books (go buy it!)

Yes, it’s not necessarily a savory recipe, per se, but the incorporation of the rosemary I thought would lend the perfect amount of “not-too sweet” to this (hopefully) fluffy treat. I also had all the ingredients readily available, so I knew it was the baking gods way of saying “yup, this is how you’re spending your afternoon”

Scones

So I thought “oh man, lemon and rosemary! What a great photo op” but I neglected to notice that I only had 1/2 of a sad lemon at my disposal. So I apologize for whatever this is:

LemonRosemary


Anyhoo, this recipe is super easy (and uses wheat flour, huzzah), even when you’re over-mixing your flour and butter. You also get to create a delicious mixture of sour cream, lemon zest, and chopped fresh rosemary for the dough.

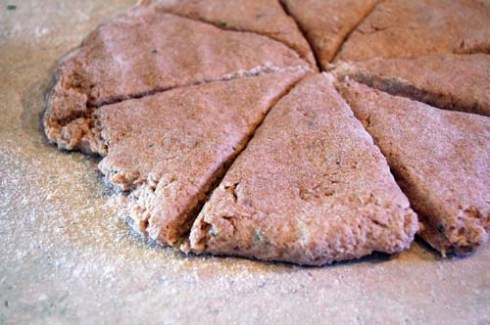
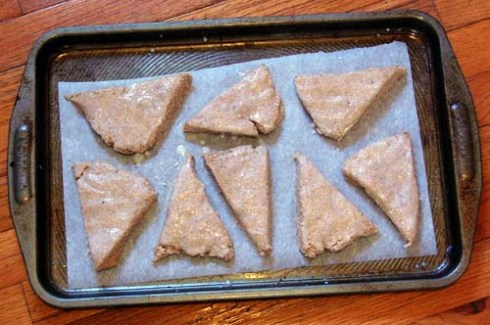
SourCreamSo once you’ve added your sour cream mixture and overworked your dough, roll it out (read: gingerly smash down with your palms) into a circle, and cut into 1/8ths.

SconeDoughBrush buttermilk over the top of the scones and sprinkle a HEALTHY dose of sugar over each piece.

SconeSheetBake, take out, try to let cool, enjoy.

SconesAs I had feared, I completely overworked the dough, so I didn’t get my fluffy scone texture, however they were REALLY tasty. The lemon and the rosemary weren’t overpowering, and completely earned their “scented” title from the name of the recipe.

I’d say the thing I enjoyed the most was waking up the next morning to see a pile of these bad boys on the counter and thinking “holy crap, I forgot I made those! Happy Breakfast to us all!”


Eastern European Salad with Homemade Focaccia (and Goat Cheese Spread)

15 Apr

Mmm, Eastern European food, doesn’t it just make your mouth water…or does it make you think of old women with scarfs tied around their heads huddled around a big trash can full of fire, playing violins?

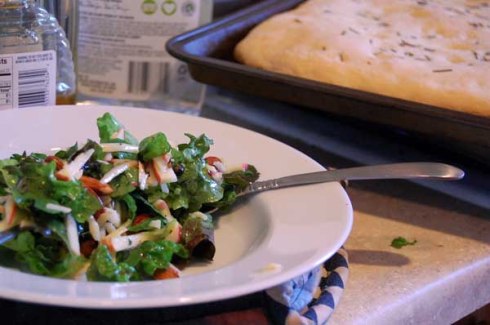
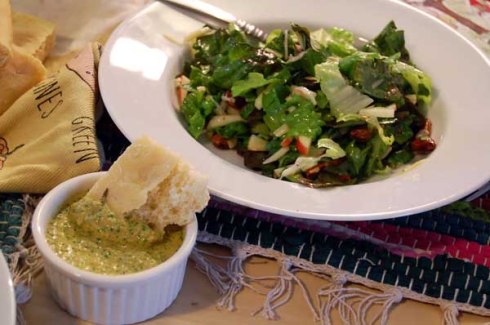
I’m still traveling on my tour de new cookbook so I’ve selected two new recipes to try out:  Focaccia with Goat Cheese and Roasted Red Pepper Spread from Home Made, and Scandinavian Mixed Greens and Apples with Juniper Vinaigrette (or as I like to think of it, Eastern European Salad) from Susan Feniger’s Street Food

SaladSpread2

Full disclosure: I love focaccia. When we were younger we would  go to the Kalamazoo Farmer’s Market every Saturday morning, and then follow up the trip with a stop at MacKenzie’s Bakery. It was here I first tasted the fluffy and delightful flat bread (although I assume my love for it blossomed from the fact that it’s basically a pizza, and I was allowed to eat it for breakfast). For the first few years of this tradition I had no idea I was pronouncing it wrong. Fo-Kot-See-Ah rather than Fo-Caach-Yah. How dare no one tell 8-year-old Erica she was making a mockery of the slow-risen dough arts? So naturally when I came across the Mini Focaccia recipe in Homemade, I simply HAD to make it.

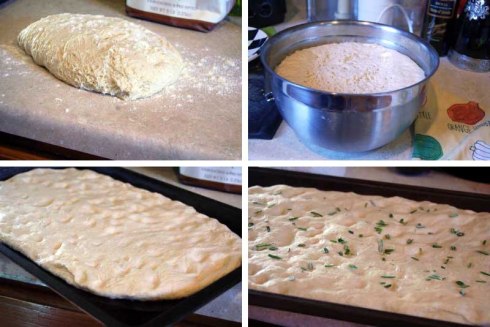
DoughAnd if you have errands to run, starting bread is the prefect activity to start before you leave the house because it’ll proof (rise) for as long or longer than you need it to, and since you’ve been busy trying to drive in this town without hitting some of THOSE DAMN JAYWALKING STUDENTS you’ll forget you even started it, and have a pleasant surprise waiting for you when you get home. And nothing calms you down from said driving more than gently pressing oiled dough onto a baking sheet and carefully distributing dimples throughout.

And what pairs with this bread? A roasted red pepper and goat cheese spread of course! This is the first time I’ve tried to roast my own peppers at home since I don’t have a grill (I know, I’ll be lamenting this all Summer long…everything EVERYTHING tastes better on a grill), and the process comes from placing a fresh pepper directly on the flame of a gas stove burner.

PepperBurnsWell, it worked with flying colors, and I felt like a badass doing it (although everyone in my house kept saying “is someone smoking? it smells like smoke” or “Erica are you serious with this, you’re going to burn this mother down”). Once the pepper is nice and roasted/burned/chared/whatever you want to call it, place in a plastic bag for 30 minutes to give it a nice sweat. Once nice and sweaty, remove the outer charred skin (since it’s bitter) and prepare for goat cheese-ification.

FoodProcessorA few changes I made: the recipe calls for mint, but I had cilantro readily available, so I made the switch to give a little “authentico” feel (#ifyaknowwhatimean), and for some reason the grocery store didn’t have jalapeños (que?) so I used pablanos. And as I’m about to add the Goat Cheese, I realize I didn’t read the recipe fully, and it calls for FOUR CUPS of Goat Cheese. Do you know how much money that would cost? I only found 2 pennies on the ground during my runs this week, I can’t afford that much creamed gold. And I don’t think any amount of homemade Focaccia can handle 4 cups worth of goat cheese spread. So I used 2oz. Needless to say, the “spread” was more of a soupy dip since the “juiciness” of the peppers comprised most of the raw materials. However, it was still delicious.

And speaking of Authentico…

ModeloBecause hey why not!

Now on to our Eastern European-inspired salad. The “exotic” ingredient in the dressing is ground Juniper Berries, and I winced thinking about how much a little vile of it would be when I only needed 2 tsp, but low and behold, I live less than 1/2 mile from Spice Merchants, a lovely shop full of (wait for it) spices! I got to park for free since it was Sunday, and when I walked in the Juniper Berries were literally in front of the main entrance at eye level (things were coming up Vitkin!).

Juniper


This gets added to a dynamite mixture of lemon juice, olive oil, and honey (which is the basis for any great dressing, seriously, you never need to buy a vinaigrette again, just use that base and go crazy with other additions like mustard, spices, fresh herbs, blended roasted veggies, etc). Sidenote: I just found this about Juniper Berries, so naturally I’m freaking out “If you have been using juniper berry tea for several weeks and you urine smells like violets, you have been using the herb too long. Continued overdose can cause renal irritation and blood in the urine, so only use in moderation” [horrifying Juniper Berry information source]

So what does this violet pee-inducing vinaigrette go on top of? A salad of sliced apples, shredded gouda, fresh greens, watercress, and toasted almonds. Like I said, soooooo Eastern European…

AppleAlmonds

SaladAnd what perfect timing, as the dressing goes on, the bread is hot fresh and ready from the oven!

SaladCounterThe Focaccia turned out well, but it was very dry. Something I love and hate about a great focaccia is that it leaves you with big grease stains on the sides of your pants because who has time for a napkin. This one left my pants in pristine condition, so making this again I would definitely up the olive oil in both the dough, and the pre-baking prep.

SaladSpread

As I start to go for round 2 of this salad, I can’t help but worry about the future of my urine…

SaladSpread1


Fig, Olive Oil, and Kosher Salt Challah. CHALLAH!

27 Sep

Baking has always been a little intimidating to me, There is just so much SCIENCE behind it! When you want to make a double batch, you can’t just double the recipe because of the ratio of leavening agents (baking soda/powder, yeast, you know, stuff my ancestors didn’t have when they made matzoh).

Sidenote: what is the difference between Baking Soda and Baking Powder?  They are both (as I mentioned before) leavening agents, which means they work with the other ingredients to create carbon dioxide which makes the baked goods rise Rise RISE! Well I took the liberty of looking into these happy cousins (and I threw yeast in there for just shits and gigs), here are some specifics

  • Baking Soda :: 100% Sodium Bicarbonate. It needs to be combined with a liquid AND an acid in order to create the chemical reaction to awake the awesome power of…itself. The carbon dioxide bubbles expand under oven temperatures (so be sure to bake immediately after mixing!).
  • Baking Powder :: Mainly Sodium Bicarbonate, but also has it’s own acid included (usually cream of tartar or corn starch). It also needs to be mixed with a liquid to activate  its self. Technically you can substitute this for Baking Soda, but it’ll probably affect the taste, and you’ll need a different amount, but c’mon friend, you’re playing with fire. Bite the bullet and pay the…what, $0.79 for Baking Soda which will last you about 4 years. You can also make your own Baking Powder by mixing Baking Soda with…you guessed it, Cream of Tartar, but then again…$.079….
  • Yeast :: And now we’re getting into organic territory. The previous 2 agents create chemical reactions, where yeast is a LIVING THING…and also gives bread that awesome yeast flavor (and let’s not forget beer, sweet, sweet beer). Yeast also needs a liquid to be activated, but in order to create the carbon dioxide it feeds on sugar. It eats the sugar, and dispels carbon dioxide.

And here we are. Baking anxiety. I’ve had plenty of loafs not work out because my yeast was old, or I didn’t let it dissolve properly, or I sub-consciously sabotaged myself, and so every time I start a baking project (from scratch, of course), I get a little nervous. But, c’mon, if you saw this could you say no:

Fig, Olive Oil, and Sea Salt Challah – Smitten Kitchen

Holy crap. This looked amazing, and it tastes AMAZING. I dove right in, and it worked out so well. I was apprehensive to work with figs because I HATED fig newtons when I was younger because they looked like chocolate, but they weren’t chocolate. They were gross fruit masked in a delicious dark color. Stupid Fig Newtons. So I’d say this is the first time I’ve gone out of my way to interact with a fig. We got along quite nicely.

Hello pile of sweet seedy stones

So while I’m letting the dough rise (eat that sugar yeast!), I made the fig “paste”, which also leads me to the point in the story when I didn’t follow a specific direction. I had the figs chopped up and everything in the sauce pan

Would you believe this is the most tan I’ve been in about 5 years?

And then once it was made, I thought “hmm, I thought the figs would break down since it looks so velvety smooth in the photos”. Well a food processor makes things velvety smooth, a food processor step that a certain someone completely looked over. Sigh. Which made “spreading” it in the dough a little difficult

Thank god for counter space

But I rolled it up regardless, and MASTERED the intricate wrappings of the fig-filled tubes

CHECK THAT OUT!! At Zingerman’s they call it a “Challah Turban”

And baaaaZING

Sweet sweet beauty

I’ve made a few Challah in my day (scroll down to see more) and this is the only one I’ve ever double egg washed, but it did give it a great deep brown color. Also, it started browning too early, so I had to wrap it in tin foil during the last 10 minutes, which I have never had to do before, but a great tip! After the egg wash you top it with some additional salt (which is also in the fig paste, I also used Kosher salt rather than sea salt since that’s what I had and I don’t bend for anyone). If you’ve ever had salted caramel, you’ll understand how amazing the salt interacts with the sweet figs. I would probably put even more on if I could go back in time (funny story, I just saw Back To The Future about a month ago for the first time, I finally understand all the references!).

My past Challahs (all taken with cell phones…and of course I included this one just because…)

I can’t complain about any one of these. I love challah, and homemade Challah just adds to the excitement. Shalom!

Wow, this bread is AMAZING. I waited maybe a full 50 seconds for it to cool before I took a slice out and then my eyes cartoon popped out of my head. I actually like the chunks of fig woven throughout, rather than in a sweet succulent and velvety paste (ok, I am curious what it would be like, but NO REGRETS). Please please please try this recipe (and post pictures! I want to see) because it is impressive looking, and so so good!

Shana Tova (Happy Jewish New Year!) It’s actually Yom Kippur today, can you believe how time flies, it’s already 5773!


Naughty Rhubarb Scones

7 Sep

I’ve been thinking of scones for QUITE some time. Why? Who knows. I recently downloaded the Epicurious app on my phone when I went through a ton of Bon Apetit magazines in Portland, and realized all the recipes in the magazines are available in the app. How. Cool. So I took this handy tool and did a search for scones, and…well, ended up using something from Food52 (again, I love this site), but I have about 20 recipes book marked on Epicurious (that’s right, you can book mark certain recipes, right on to your phone!).

Before I got started, I needed to set up an “air conditioning” system in the kitchen so as not to sweat directly into the scones. Sweat. Directly. Into. The. Scones. So, using my good old-fashioned ingenuity and a little elbow grease, I came up with a highly-involved cooling system.

Who needs conventional air conditioning when you have a big dirty fan?

I took a box fan we had running in the living room, and set it on top of a stool, and pointed it at my knee-to-ankle area. It was delicious.

Anyhoo, I found this recipe for Naughty Rhubarb Scones, and was apprehensive at first. First, it calls for half and half as the main “wet” ingredient, and I don’t typically use ingredients like that (1. I never use it all, so a lot of if gets thrown away and 2. IT’S HALF AND HALF FOR GOD’S SAKE, creamy and sinful!). Second, I’m not a fan of Rhubarb for a few reasons:

  • I’ve never cooked with it
  • It looks like red celery
  • In my childhood house growing up we had a pet cemetery that was the resting place for Black Tiger (our first cat, crushed by a GARAGE DOOR), about 10000 rats (my sister got rats as pets when she was younger, and they weren’t fixed, so they had HUGE litters each month, with many stillborns, and then when we got the male, Scruffy, fixed, he died from the operation), some fish, and probably some other pets. And what happened to be growing on top of this animal death plot? None-other than a rhubarb plant. Rhubarb = Plant that feeds on death.
  • It’s really bitter

So, you can understand my apprehension at working with it for the first time, but hey, Quarter-Life Retirement! Try something new, even if it reminds you of your deceased cat. So I got some from the Farmer’s Market, and set out to make’a some scones.

Rhubarb is…bitter. Very bitter. This recipe calls for you to macerate the rhubarb in sugar for a few minutes before adding (macerate = soften/break up by soaking, in this case, the sugar helps break down the rhubarb and take away some of the tartness) it to the mix. I would suggest keeping it in the sugar for at least 30 minutes to try to “sweeten” it up more.

I don’t have a stand up mixer (something I want more than anything in my life ever…a KitchenAid Stand Up Mixer), so anytime I’m baking, I don’t look forward to the mixing aspect, especially if it calls for cold butter to be “cut in” since it’s important not to over-mix, and you want to keep the butter in little chunks somewhat since that’s what gives the product (in this case, the scones) its flaky buttery goodness. So, I always get nervous. I’M GOING TO OVER MIX, I’M GOING TO UNDER MIX, THESE WILL BE THE WORST SCONES EVER. But, this recipe gives a tip to put the flour mixture in a food processor with the butter, and mix from there. GENIUS!

And then we turn the blade on. It’ll be a bloodbath.

It worked well, better than I normally “cut in” the butter by hand, but I may have over-mixed it a bit, since instead of having little “pea-sized” chunks left, I had a uniform “sandy” type texture. Live and learn!

With the air blowing at my calves and a nice butter/flour mixture at my disposal, I assembled he rest of the ingredients, rolled out the scones, cut them out, and popped those suckers into the oven. Then I turned to my counter, and noticed the disaster left in my wake:

Do you see the lengths I go through for you people?!
Stupid clean up.

The smell came wafting out of the oven and I was PUMPED. I took them out, let them cool for about 25 seconds because, who am I kidding. Awe-some. They are “naughty” indeed. They need no butter, no jam, the half and half make them super creamy and moist and just super. My scones didn’t come out quite as layer-y and dense as I would have liked, and I assume it has to do with my over-butter-mixing. But the taste more than makes up for it. I will definitely make these again, but I will probably swap the rhubarb for some other fruit (strawberries? go all out and do chocolate-toffee? currants? only time well tell) because they are just so tart, and bring back old kitty memories. And now, the reveal:

I tried the straight overhead shot…someone is too short to make it work (hint: it’s me).

And hey, why not, here’s another money shot:

Scones + Plate = a nice civilized breakfast

Tiny Portal

Awkwardly walking through life's little doors
Go Jules Go

Author. Blogger. Chipmunk enthusiast.

Things that we like

Beer. Sports. Food.

Modern Day Forager

All Roads Lead to Food

Reading Runner Girl

Reading. Running. & Other Things.

Aerogramme Writers' Studio

Books and Writing | News and Resources

The Tomato Tart

But check your lease, man. Because you're living in Flavor Country.