Homemade Juice with a Side of Elbow Grease

23 Nov

Yes, Yes, it’s been a while since I’ve posted, I know. I’ve been trying not to do it [in the immortal words of Cher Horowitcz] sporadically, but here we are. Life adjustments require….adjustments? New job, schedule changes, wedding planning, holiday season (and by that I mean Halloween, Election day, and All Stouts Day, of course).

Juice


So I’ve been dying for a juicer for a while. I would love to start all my mornings with a delightful fruit/vegetable juice, however I’m not about to spend $6 a pop at a hip cafe, knowing that I’m taking in $0.30 worth of raw material (get it…RAW!). So after an impressively unhealthy weekend, I decided to get a little creative and see what I could come up with when left to my own devises. I began by packing my blender full of goodies (kale, cucumber, carrot, broccoli stem, pear, apple, frames, chia seeds, water) and prepared for a whirlwind of colors to blend into a beautiful haze of tasty and nutritious liquid. However, what actually happened was the blade lamely started to cut at the bottom-most veggies, and everything just stayed in place. Awesome.

I grabbed my step stool (because I can’t reach the top of my fridge, I’m short) and got out my handy food processor. I dumped everything into the food processor and gave it another go (while doubling the amount of chopping aparatei I have to clean up in one fell swoop). The second go was successful. I decided “who needs to strain all the nutritious goodness that is the vegetable pulp” and drank it like a smoothie, fiber train here I come! Yikes. Not good. If I every try to make dinner out of a lawn I assume this is what it tastes like. I choked it down and wasn’t ready to give up (mainly because I had a a HUGE amount of veggies and fruits left since I had planned for a “healthy” week)

The next morning I got my hands on some cheesecloth and did the same thing, with the addition of hand-wringing sweet delicious juice out. It worked beautifully, however the whole thing (getting everything out, chopping it up, putting it into the processor, winging it out small batch by small batch) took about 25  minutes, without clean up. I don’t know about you, but I’m waaay too lazy to start my mornings with that much work outside of the gym, so I’ve decided to kick back and hope the upcoming holidays yield a juicer (I have a bridal shower right after christmas, time to practice my “you shouldn’t have” face).

Juice1


One last thing to leave you with: I take fiber pills every morning and drink coffee religiously, so this juice added with my normal regimen made my digestive system something to be envied…or feared, I’m not sure yet.

Detox Butternut Squash Soup with Wheat Challah

22 Oct

Soup

We  spent the weekend in beautiful rural mid-Ohio (is that a thing?) at a really fun and beautiful wedding which took place on a farm and encouraged camping. Since we didn’t get the chance to camp this Summer we were determined to spend the night in the great outdoors, no matter how drunk it was or cold we were (guess what, sleeping outside in a non-properly set up tent during the first frost of the year on a 80% inflated air mattress ISN’T the most comfortable way to spend your night, also if you’re…um..”dehydrated”). Fast forward to Sunday morning while we’re starting our 4 hour trip back to Michigan (where everything makes sense and the speed limits don’t dip below 70!) with both our phones dead–and our souls not too far behind–and a chill deep DEEP into the bone, I knew a warm, comforting and HEALTHY meal was in order…and I knew it had to involve squash because hey, tis the season. I came across this little gem

{ Roasted Butternut Squash, Carrot, and Ginger Soup – With Style and Grace }

Well if I’m going to make soup, I need something to dip in it, right? I have been hankering for some good homemade Challah (everyone’s favorite jew-flavored bread)

{ Ima’s Challah – Food52 }

I love making bread (especially Challah) on a lazy Sunday because you start it in the morning or afternoon, forget about it for a couple hours, come back and BOOM it’s twice the size and you feel as though you have created life…LIFE! And who doesn’t like braiding dough? I used a blend of white and wheat flour (side note: I prefer wheat flour for the nice chewy texture and the health benefits, but white flour is just better for certain breads, especially when you want that silky texture, and subbing wheat for white doesn’t always translate in the recipe, I’ve learn the hard way. Anyhoo, I only had 1.5 Cups left in my white flour bag, hence the “blend”, I was nervous to say the least) and I saw some sesame seeds sitting up on the spice shelf screaming “C’MON MAN, JUST SPRINKLE ME ON TOP, C’MONNNNNN” so sprinkle I did. This yielded 2 loaves (we smashed through one of them in about an hour, so I decided it was best to give away part of the second one because no one needs a full loaf of bread in 24 hours).

The white and wheat blend of flour was PERFECT. There is a good dose of honey in the dough which lends the perfect hint of sweetness. I must say, this is one of my favorite recipes I’ve ever used for this Jew-tastic bread!

Challah


Meanwhile, while all this is happening (mainly the waiting and rising dough) make dat soup. I personally am not a fan of the overly sweet and over dairy-ed squash soups (better than saying “overly creamed”). I usually like to toss a roasted apple in, but with the ginger I decided to add a can of coconut milk to add that extra creaminess without the use of dairy. I also made the executive decision to add some braised kale and white beans for some extra “detoxiness” to the soup. I was met with delicious results.

Soup1

Inspired by { Roasted Butternut Squash, Carrot, and Ginger Soup – With Style and Grace }

  • 1 Medium Butternut Squash – Peeled, seeded and cubed (1/4″ dice)
  • 5 Large Carrots – Peeled and cubed (1/4″ dice)
  • 1 Medium Sweet Onion – Small dice
  • 5 Cloves Garlic – Minced
  • 1 “thumb” size piece Ginger – Peeled and minced
  • 1 tsp Nutmeg
  • 3 lb Vegetable Stock
  • 1 Can Light Coconut Milk
  • 1 Head Kale – chopped small
  • 1 Can white beans – drained and rinsed
  • Olive Oil
  • Salt, Pepper
  1. Preheat oven to 375
  2. Toss carrots and squash with olive oil, salt, and pepper and spread out over 2 baking sheets with tin foil. Roast for 40-45 minutes (stir and rotate pans halfway through cooking).
  3. Heat olive oil over medium heat, add onions and cook until soft (about 3 minutes), add garlic, ginger and nutmeg and cook for additional 4 minutes until onions are translucent and cooked through. Add roasted squash/carrots and vegetable stock, bring to a boil then turn down heat to simmer for 20-25 minutes uncovered.
  4. Add coconut milk to soup and use an immersion blender to blend  about 85% of the soup (I personally like a few vegetable chunks here and there, it’s up to you)
  5. Meanwhile blanche the kale in boiling water for about 3 minutes to soften and take some of the natural bitter bite out and transfer right into blended soup. Add the beans. Simmer for an additional 10 minutes until the beans are soft.


{ Ima’s Challah – Food52 }

  • 1 1/2cup warm water, divided
  • 1/4 cup plus 2 teaspoons sugar, divided
  • 1 Packet instant Yeast
  • 6 cups flour — 1.5 white, 4.5 wheat
  • 2 teaspoons salt plus more for sprinkling on crust
  • 1/4 cup mild honey, plus an extra tablespoon for eggwash, if desired
  • 2/3 cups flavorless vegetable or canola oil
  • 4 eggs, plus one yolk for eggwash, if desired
  • Sesame seeds
  1. Put 1 cup warm water in a small bowl. Add 2 teaspoons of sugar, sprinkle the yeast over top, swirl the bowl just to combine, and leave it to proof for five minutes.
  2. While yeast is proofing, mix flour, salt, 1/4 cup of sugar in a large bowl (or in the bowl of a stand mixer fitted with the paddle attachment.) Stir to incorporate or blend on low speed.
  3. In a medium bowl, mix remaining water, honey, oil, and eggs.
  4. When yeast has finished proofing, add it to the flour, immediately followed by wet ingredients. Mix with a large wooden spoon or on medium-low speed in the mixer, just until combined, about 30 seconds.
  5. Switch to dough hook and begin to knead on low speed, making sure to incorporate what’s at the bottom of the bowl if the dough hook misses it. If kneading by hand, stir using spoon until dough becomes to thick to stir. Empty dough onto well-floured surface and knead by hand. Knead dough until smooth and no longer sticky, adding flour with a light hand as needed, 7-10 minutes.
  6. Split the dough into two equal pieces. Set each in a large oiled bowl, cover both bowls with plastic wrap or a damp towel, and let rise at room temperature until doubled in size. If using white flour, this should take about 2-2.5 hours. If using white whole wheat, it will take closer to 3.5 or 4. Feel free to let the dough rise in the refrigerator overnight instead; if you do this, be sure to set out the dough in plenty of time before shaping, so it can come to room temperature.
  7. Preheat oven to 375.
  8. After the rise, the dough should be soft and pliable. Separate each mound of dough into three equal balls, for a total of six. Roll each ball into a log almost 1-foot long. Braid the logs together to create your loaf. For the nicest-looking braid, do not pinch the top edges of your logs together before braiding; simply place one log over the next and braid until you reach the bottom, then pinch those edges together. Then, flip the unfinished loaf the long way, so that the unfinished edge is now at the bottom and the loaf has been flipped over and upside down. Finish braiding and pinch these edges together. This way, both ends look identical. Tuck the very tips beneath the loaf when braiding is finished. Repeat with second loaf.
  9. Put each loaf on its own parchment-lined baking sheet. If using eggwash, mix yolk with a 1 tablespoon water and 1 tablespoon honey. Brush over loaves. Sprinkle with salt and sesame seeds.
  10. Bake at 375 degrees for 20-22 minutes, until challot are golden and baked through

A Fall Favorite

7 Oct

DSC_0003

The leaves are changing color, the new season’s boots are on display, and the weather is still…in the 70s and 80s. Sure, that makes sense. This warm Fall weather is making it hard to enjoy sweaters and a good butternut squash soup, but no complaints here. Although I am from Michigan, I will never get used to or start enjoying cold weather (I fancy myself a sledder more than a skier). Don’t get me wrong, I love a brisk high 50s day with crunchy leaves lingering in my path–and who could forget about the great Brown Ales to enjoy to welcome in this new season–but having the knowledge that we won’t see warm weather again until May (IF WE’RE LUCKY) makes me want to cling on to this weather with all my might.

That being said, it’s not going to stop me from enjoying some of my favorite Fall foods (root veggies and squash, I’m looking at you…). I touched upon this recipe in last year’s Thanksgiving post, but this dish is so good, it truly deserves its own post.

{ Curry-Stuffed Delicata Squash – Big Girls Small Kitchen }

I’ve made this delight at least a half dozen times over the past year, and it just keeps getting better and better. And what’s great about Delicata squash (if you can find it, I often sub butternut squash since that’s much easier to find) is that you can eat the skin once it’s cooked (thank you knowledgeable staff at the Ann Arbor Food Co-Op).

Special ingredients like maple syrup, cilantro, and unsweetened coconut flakes give this dish a unique layering of flavor and promote over indulging (go ahead, have 3 halves…if you dare).

DSC_0002


Unfortunately I had poor planning when I made this, as I had 6 beautiful stuffed squash (or squish as we refer to it in our house, mainly for hilarity purposes) halves, and I was leaving for Kalamazoo for the next 5 days for new job training (I got to brew beer and “taste” a lot of beer…you jelly?). I had a choice to make, gorge myself on as many of these as I could in order to reap what I had sewn, or bring some with me to keep in the hotel room. I chose the later, however I forgot them in my trunk and came across them 4 DAYS AFTER I was already back from Kalamazoo (5 days + 4 days = I don’t think these are edible anymore). So the moral of the story is this stuffed squash will not smell up your car when forgotten, so go team?

Curry-Stuffed Delicata Squash – Big Girls Small Kitchen }

For the squash

  • 1/2 cup black lentils – the little French ones that hold their shape
  • Coarse salt
  • 1 cup white basmati rice
  • 3 delicata squash, halved lengthwise, scraped clean of seeds
  • 2 teaspoons neutral oil
  • 1 teaspoon maple syrup
  • 1/4 cup olive oil
  • 2 teaspoons super fresh curry powder
  • 1/4 cup shredded coconut, preferably unsweetened (but sweetened will work in a pinch)
  • 1/2 cup yellow raisins, submerged for 10 minutes in a bowl of boiling water to plump, squeezed dry
  • 1/4 cup roasted unsalted sunflower seeds or peanuts
  • Handful coarsely chopped fresh cilantro leaves for garnish

For the dressing

  • 1/3 cup mayonaise
  • 1 tablespoon lemon juice
  • 2 teaspoons curry powder
  • 1/2 teaspoon coarse salt
  • 2 tablespoons neutral oil
  • 1/2 teaspoon sugar
  1. Preheat the oven to 400°F.
  2. Bring around 6 cups of water to boil in a small saucepan. Add 1/2 teaspoon salt and the lentils. Lower the heat to a simmer and boil for 20 to 25 minutes, until the lentil are soft but not falling apart. Drain in a fine metal sieve. Set the lentils asie.
  3. Rinse the rice in several changes of water, until the water runs clear. Place it in a small covered saucepan with 1 3/4 cups water and 1/2 teaspoon salt. Bring to a boil, then give the rice a stir, put the lid on, and place the pot over the lowest possible heat. Cook for 15 minutes, then turn the heat off and leave the cover on the rice for another 5 to 10 minutes, or until you’re ready to use it. (If you have a preferred method of making rice, go for it. You’ll need 2 cups of cooked rice.) You’ll need 2 cups of the rice; reserve the rest for another use.
  4. Place the squash halves in a lightly oiled baking dish. Combine the oil with the maple syrup, then brush the squash with the mixture. Season with a pinch of salt. Place the squash in the oven and cook them for 30-40 minutes, until they’re easily pierced with a fork.
  5. In a large, heavy skillet – a cast iron pan works great – heat the olive oil over medium-high heat. Add the onions and cook, stirring occasionally, until they are wilted and slightly brown, about 10 minutes. Add the curry powder and 1/2 teaspoon salt, until the curry powder is very fragrant, about 3 more minutes. Add the coconut and cook for another minute, then add the lentils, the raisins, sunflower seeds or peanuts, and 2 cups of the rice. Stir gently to combine all the ingredients. Remove the skillet from the heat.
  6. Make the dressing: combine the mayo, lemon juice, curry powder, salt, oil, and sugar, and stir well.
  7. Add about 3/4 of the dressing to the lentil-rice mixture and stir to combine. Taste for balance of flavors, adding more dressing or salt, pepper, or lemon juice as needed. You want the mixture to hold together well.
  8. Fill each squash half to overflowing, using about 2/3 cup of the mixture. Return the squash to the oven and bake for 10-15 minutes, until the top of the filling is slightly browned and crisp.
  9. Sprinkle with the cilantro leaves. Serve 2 halves to those with big appetites; 1 half will be enough for smaller eaters.

Beer Muffins + An Apology

20 Sep

Hey, when was the last time I posted something? I don’t even remember!

The past month has been a whirlwind of work, let downs, work, beer, amazing opportunities, work, great GREAT news, and new beginnings. Needless to say, there has not been much time to blog, or even to cook much. It has been as devastating to me as it has been [hopefully] to you.

I was going to write a nice post about these “delightful” beer muffins I made a few weeks ago with a SURPLUS of raspberries I had….

Sidenote: I love berry and apple picking. Is there anything better? No, and if there is I sure as hell don’t want to hear about it. I’ve been bothering John to go pick some type of fruit with me for the past 7 or so years ( we went Apple picking a few years back AND IT WAS SMIPLY LOVELY) and finally we went raspberry picking. Of course it happened to be about 95 degrees with Mr. Sun doing his job like nobody’s business, but hey, we were in the fields and providing for our kin (by “kin” I mean ourselves, I’m WAAY too selfish to care for any other being at this point). Anyhoo, our day in the fields yielded about 100000 tons of berries, let along the most delicate berries there are…which led me to frantically make anything and everything that utilized raspberries, taking us back to the surplus.

I came across a recipe for { Rhubarb Swirl Muffins – Draft Magazine } and figured hey, I hate rhubarb, let’s sub out some raspberries. And sub I did. The recipe yielded a VERY wet batter, and even after adding more flour, and baking for almost double the time, they still turned out….not totally done. But hey, the top was tasty, and who doesn’t like a good muffin top!

BeerMuffins


So I apologize for the lack of posting, and this lack-luster post, but hopefully things will be on schedule in the upcoming weeks, as I start a new position with a WONDERFUL and MAJOR brewery in Michigan. (the recipes may get a little lighter to account for all the extra calories I’ll be taking in from the beer…lots and lots of beer…)

So go forth and enjoy your weekend knowing that I am, in fact, NOT dead.

Thai Inspired Tomato Soup, Roasted Corn with Manchego, and Cabbage Wrapped Whitefish

29 Aug

What a mouthful! It has been some time since I devoted a whole evening or afternoon to cooking, so I decided to change that, especially when all this amazing produce is fresh and ripe and at my fingertips. After I spent a few hours looking through a few year’s worth of Bon Apetit magazines, I settled on 3 recipes I wanted to try. Two of them really worked together, and one was not quite the same flavor profile, but whatevs.

Meal

Tomato and Crab Soup – Roasted Corn with Manchego and Lime – Savoy Cabbage Rolls with Halibut }

Stop me if you’ve heard this, but I don’t have the best of luck when it comes to fish at home. I always make the wrong decision at the heart of cooking (at the store) because whatever I’m looking for they don’t have, and then they don’t have a suitable substitute, or what I’m looking for is $30/lb and let’s be honest, there’s no way I can bring myself to spend that kind of money (especially since I’m sure I’d end up over thinking the actual cooking process, and end up ruining the fish…THE FISH I JUST SPENT $30 ON). But I digress…

Let’s make some soup! So this is an interesting take on a tomato soup, using fresh Thai-like ingredients like coconut milk, fish sauce, and lemongrass. When using lemon grass in the past I’ve smashed it, and added it to soups, only to be taken out before serving. This soup called for it to be sliced (not smashed, mind you), and sautéed with some onions as a starting base.

Lemongrass


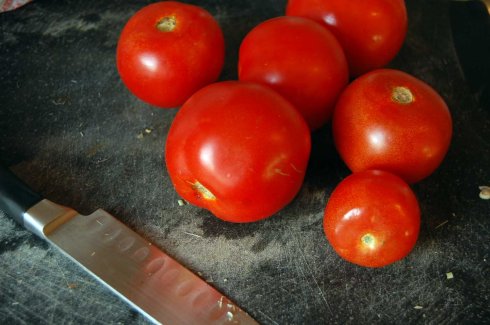
One your aromatics are softened up, add your beautiful fresh and vibrant tomatoes

Tomatoes


Cook until those are starting to soften, then add your liquids (fish sauce, coconut milk, stock, and orange juice)

Soup


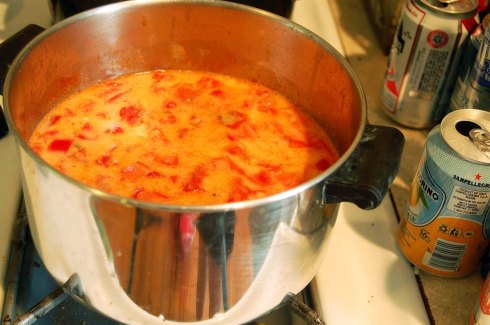
Let simmer for about 15 minutes for all the flavors to incorporate, then blend with a handy immersion blender. Add the juice of a lime and taste to adjust seasoning. Easy peasy.

For the corn, pop unhusked corn in the oven for about 15 minutes to give it a crisp-tender consistency

CornHusk


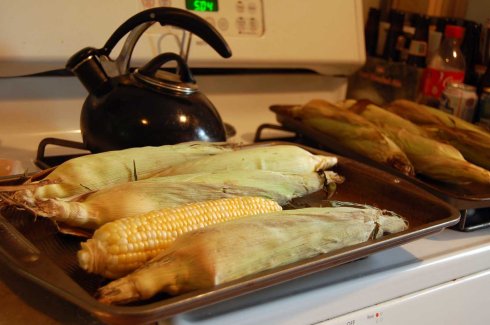
Unhusk corn (please wait until it cools, don’t try to be a hero like me….there is no way to look “cool” while trying to shuck hot steaming corn), and add to pan with heated oil. Season with salt and pepper

CornStir


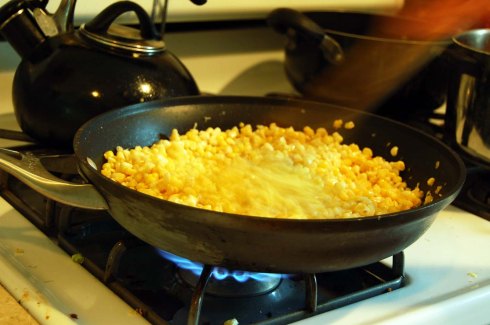
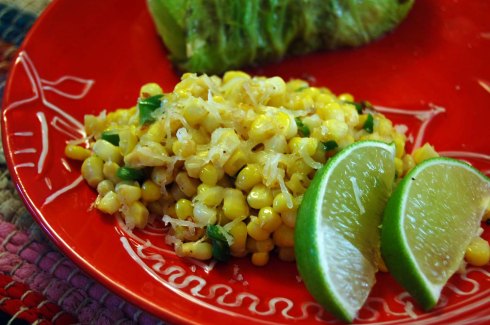
Take off heat, and add a diced jalapeño, some red pepper flakes, and squeeze a lime over the whole thing. When cooled and ready to serve, grate some tasty TASTY Manchego cheese over the sweet bounty. I know I’ve sang the praises of the Plum Market cheese counter in the past, but man, they’re just the best. They were able to cut me down a nice $4 portion and it was plenty for this meal, and you know what, you can just tell they really love cheese!

And lastly, the fish. Peel off about 6 leaves of a Savoy cabbage and let simmer in salted water for about 2-3 minutes, until soft. Take out and plunge in ice water to stop cooking

CabbageIce


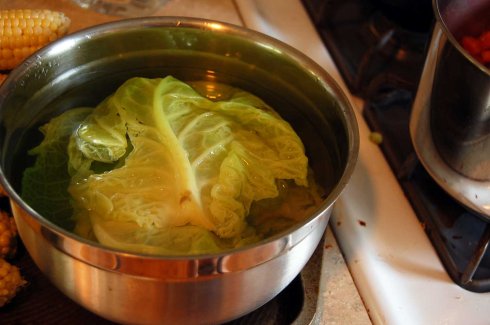
Sidenote: I now realize why my approach last September for stuffed cabbage wasn’t working. The recipe called for boiling water to be poured over the cabbage and let to sit for about 10 minutes…well that didn’t really do anything to soften up the leaves, yielding in snapping leaves and a frustrated Erica. Next time I’m definitely taking this approach of boiling the individual leaves…the more you know.

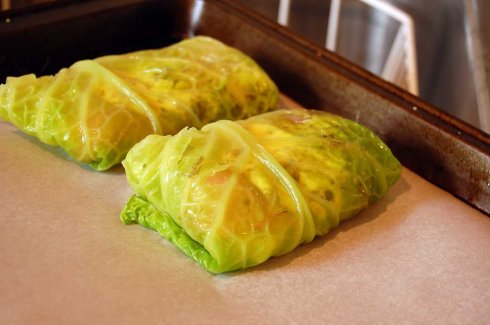
Now take your boiled/iced leaves and slice the thick part of the veins off (oh, and dry them off, no one wants a watery-fishy-stuffed cabbage situation). Mix some unsalted butter with chopped capers, salt, and pepper. Layer the leaves with a portion of fish and a healthy dose of caper butter

FishButter


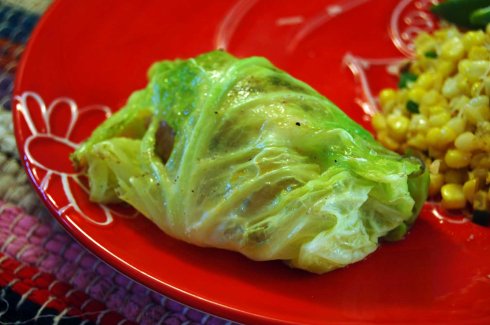
Now gently GENTLY fold burrito-style until you have neat little packages

Wrap


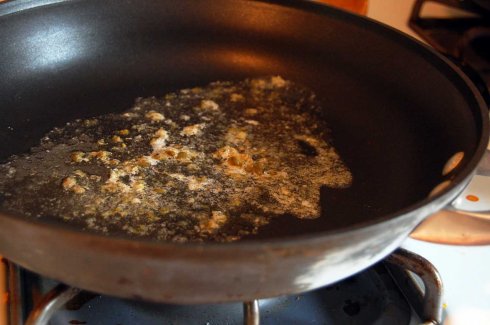
Take you reminding caper butter and place over high heat

CaperButter


Give each of the little cabbage-fish-pouches a nice little sear on each side (about 2 min per side)

CabbagePan


Full disclosure, I was going to skip this part because doesn’t that just seem like a recipe for disaster? These rolls aren’t tucked, just placed together, but it was fine…somehow…I didn’t ask questions, I just seared and gently placed back on the baking sheet. Now finish in the oven for about 10 minutes, or until the fish is fully cooked. Now, being that I don’t often cook fish at home, I’m always unsettled at the cooking process because IT’S SO QUICK and I’m convinced that I’m going to be giving everyone who is eating some type of fish-related sickness from their underdone fish, but hey, I have a clean track record to date, so let’s not look into it.

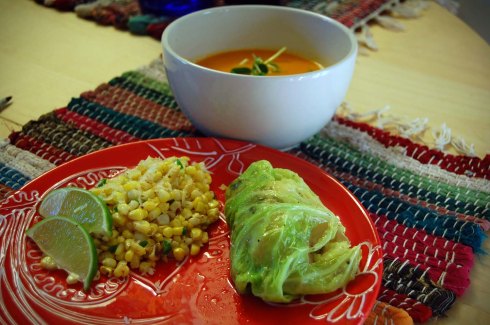
Place your NON SICK INDUCING cabbage fish packets on your plate (oh yeah….really selling these aren’t I)

CabbageFish


Add some corn (with freshly grated Manchego) and some extra lime wedges

Corn


Ladle your soup into bowls and garnish with fresh sunflower shoots you grabbed at the Market, and grab a chunk of baguette or other crusty bread

TomatoSoup


And you got yourself a god damn meal

Meal


Now the fish was tender and tasty, but in no way matched the flavors of the other items….so I think I was just over excited to try the cabbage wraps that I overlooked the flavors. I also had every intention of adding cilantro to the soup and corn, which I totally forgot about. But you know what, this made a TON of food, so I was able to add some in future sittings.

This soup is now one of my favorites, and it’s good hot or cold. An out-of-this-world meal is the tomato soup, sunflower shoots, fresh cilantro and some of this corn all mixed together. Wow, I gorged myself on that for about 5 straight days. I also just made a HUGE batch of the soup to freeze for the winter months when fresh tomatoes are a thing of yore. This recipe also calls for a fun crab salad topping (reminiscent of my “Lobster” corn soup) but I opted out since I was making the fish. Next time, it’s crab time.


{ Tomato and Crab Soup – Bon Appetit, July 2008 }

  • 2 tablespoons olive oil
  • 5 scallions, thinly sliced
  • 1 1/2 stalks lemongrass, peeled, trimmed, thinly sliced
  • 1 Fresno or Thai chile, seeded, minced
  • 2 1/2 pounds beefsteak tomatoes, chopped (about 3 cups)
  • 2 1/4 cups chicken or vegetable stock
  • 1/2 cup coconut milk
  • 3 tablespoons fresh orange juice
  • 1 tablespoon fish sauce (such as nam pla or nuoc nam)
  • 1 tablespoon (or more) fresh lime juice
  • Kosher salt
  • 1/2 pound fresh lump crabmeat
  • 3/4 cup pea tendrils or shoots, trimmed
  • 6 snow peas, trimmed, thinly sliced on diagonal
  • Heat oil in a large saucepan over medium heat. Add scallions, lemongrass, and chile and cook until softened, 3-4 minutes. Add tomatoes and cook until softened, 5-6 minutes. Stir in chicken stock, coconut milk, orange juice, and fish sauce. Bring to a boil, reduce heat, and simmer, stirring occasionally, until flavors meld, about 15 minutes. Let cool slightly.
  • Working in batches, purée soup in a blender until smooth, about 1 minute per batch. Stir in 1 tablespoon lime juice. Season to taste with salt and more lime juice, if desired. Chill, if desired. Or ladle hot soup into wide shallow bowls. Garnish with crabmeat, pea tendrils, and snow peas.

{ Roasted Corn with Manchego and Lime – Bon Apetit, July 2011 }

  • 6 ears of sweet yellow corn, unhusked
  • 2 tablespoons extra-virgin olive oil
  • 2 tablespoons (1/4 stick) unsalted butter
  • Kosher salt and freshly ground black pepper
  • 1 jalapeño, seeded, finely diced
  • 1/2 teaspoon crushed red pepper flakes
  • 1 lime, cut into 4 wedges
  • 1 cup finely grated Manchego cheese
  • 1/4 cup thinly sliced chives
  • 2 teaspoons finely grated lime zest
  • Preheat oven to 450°. Roast unhusked corn on a baking sheet, turning occasionally, until heated through and crisp-tender, about 15 minutes. Let cool. Shuck corn and cut kernels from cobs. Discard cobs.
  • Heat oil in a large skillet over high heat. Add corn kernels and sauté until heated through and light-golden in spots, 3-5 minutes. Add butter; stir until melted. Season to taste with salt and pepper.
  • Transfer corn to a large wide bowl or deep platter; sprinkle jalapeño and crushed red pepper flakes over. Squeeze lime wedges over; sprinkle with cheese, chives, and lime zest.

{ Savoy Cabbage Rolls with Halibut – Bon Appetit }

  • Bring large pot of salted water to boil. Fill large bowl with ice cubes and water; set aside. Add cabbage leaves to boiling water; cook 2 minutes. Using slotted skimmer or large slotted spoon, transfer leaves to bowl of ice water to cool. Drain. Gently pat dry.
  • Place 4 tablespoons butter in small bowl. Chop 2 tablespoons capers and mix into bowl with butter, then stir in parsley. Season caper butter to taste with coarse salt and freshly ground black pepper.
  • Place 1 cabbage leaf, vein side up, on work surface. Using small sharp knife, trim off some of thickest part of large center vein so that leaf will lie flat. Turn leaf over, vein side down. Place 1 fish fillet on bottom third of cabbage leaf. Sprinkle fish with coarse salt and pepper. Spread 1 tablespoon caper butter over fish. Fold bottom, then sides of leaf over fish. Fold tip of leaf over, enclosing fish completely. Place fish packet, seam side down, on rimmed baking sheet. Repeat with remaining cabbage leaves, fish, coarse salt, pepper, and caper butter. DO AHEAD Can be made 8 hours ahead. Cover and chill.
  • Preheat oven to 350°F. Sprinkle fish packets with coarse salt and pepper. Melt 1 tablespoon butter in large nonstick skillet over medium-high heat. Add fish packets to skillet and cook until cabbage is light golden, about 2 minutes per side. Return fish packets, seam side down, to same baking sheet. Bake until fish is just opaque in center and firm to touch, about 7 minutes.
  • Transfer fish packets to platter; cover with foil to keep warm. Place baking sheet over 2 burners on medium heat; add remaining 3 tablespoons butter and 2 tablespoons capers to baking sheet and cook until butter is golden brown, stirring constantly, 1 to 2 minutes. Add 2 teaspoons water to butter mixture and swirl to blend. Season sauce to taste with coarse salt and pepper. Spoon sauce over fish and serve.

Sea Salt Cocoa Brownies

19 Aug

This is how I spent my Sunday night: I had been eating BLT’s all day because that’s one of those common deliciously awesome things that I never think about, so when I finally have one I think “why not all the time” so we practically went through a full package of bacon making them with Sesame Semolina bread, Heirloom tomatoes, fresh Farmer’s Market lettuce, and fried (non fancy brand) bacon. Oh yeah, and Miracle Whip, because we had it and I like it, so save all the “how dare you not have Mayo”. After a day full of that type of food, one needs to finish it up with some as delightfully sweet for dessert (berries are tasty and in season and I love them but…c’mon, y’alls need come chocolate, amitrite). I also went through about 20 Bon Apetit magazines and pulled out all the recipes I want to make so I could recycle the discard pile with Good Will Hunting playing in the background. Matt Damon had such a 90’s hot haircut..but that is neither here nor there. Anyhoo, that’s just a long winded-way of saying “I made brownies”

So I made brownies. It’s been a little harder to cook in my kitchen as of late because of all the (please don’t judge me) fruit flies. They’re everywhere. And we even clean up everything as if we’re trying to pass military-grade bunk inspection. You call this a clean cutting board?! Get on your knees and clean this apartment with your TOOTHBRUSH. After weeks of luring these nightmare-inducing beings wrapped in teeny tiny packages into glasses of wine and/or orange juice (wrap the glass in saran wrap and poke a small hole in it…they can’t get out and drown…aaaahahaha). However, we’ve been losing the battle lately…until we got some great information from our good friend Internet, and learned that a glass full of 1 part apple cider vinegar and 1 part dish soap (no need to saran wrap) was just the thing to clear these bad boys out. And it worked in about 15 minutes, it was INSANE. I was going to post pictures, but then I thought it’s best not to show a bunch of dead (but dish-soap-clean) fruit flies suspended in amber liquid. So, armed with a fly-less kitchen, I got to work.

Brownie

{ Best Cocoa Brownies – Smitten Kitchen }

Combine butter, sugar, and cocoa powder in a double boiler situation (or just put them all in a bowl and put them directly in simmering water because you already had that pan out)

DoubleBoiler


Give it a good stir until everything is all melted. Take off heat and allow to cool slightly. Beat in 2 eggs, one at a time, until it’s glossy enough to check your hair, and see that you may have bacon grease on your face from that afternoon’s BLT.

Glossy


Now beat in some flour and vanilla. Once it’s nice and incorporated DO NOT STOP MIXING, continue to mix for a good 40 lashes….er, strokes until you’re so positive there is nothing that is NOT incorporated. Now pour your lovely mixture into a parchment lined 8 x 8 baking pan. Now get crazy and add some big ol’ flakes of sea salt to the top because you KNOW that going to be good.

Parchment

And bake for 20-25 min at 325. Let cool and easily lift out of pan with parchment paper (holy crap it’s clean), and try not to eat it all

Brownie


So, needless to say these brownies were really easy to make. And I just found out they freeze well, so I’m happy to say that Diabetes will NOT be in my immediate future!

Adapted from { Best Cocoa Brownies – Smitten Kitchen }

  • 8 Tbs (1 stick) unsalted butter
  • 1 1/4 C sugar
  • 3/4 C + 2 Tbs unsweetened cocoa powder
  • 1/4 tsp salt
  • 1 tsp vanilla extract
  • 2 large eggs
  • 1/2 C all-purpose flour
  • A few pinches of large flaked sea salt
  1. Preheat the oven to 325°F. Line a 8×8 baking pan with parchment paper.
  2. Combine the butter, sugar, cocoa, and salt in a saucepan of simmering water. Stir until butter is melted and mixture is smooth. Take off heat and allow to cool.
  3. Stir in the vanilla, add the eggs one at a time, stirring vigorously [vigorously] after each one. When the batter looks thick, shiny, and well blended, add the flour and stir until you cannot see it any longer, then go crazy for 40 more strokes.
  4. Bake until knife comes out clean (about 20 to 25 minutes). Lift out with parchment and enjoy!

Time Consuming (worth it) Beet Burgers

12 Aug

Burger1

I don’t care if it’s Summer, I love beets. Even the ungodly things they do to my…inner-workings, I accept beets for who they are. I have been getting emails from The Kitchn for a while, and to be honest I don’t remember how why or when I signed up. The recipes always make me stop and read through, but I finally decided to jump in and actually MAKE something and yowza, it was the right thing to do my friends. I have 100000 other things off this site bookmarked now, so….be ready for that.

I am always on the lookout for a great veggie burger. Why? I don’t know. I love meat, but maybe it’s just the promise of lots of non-meat items coming together to create a flavor-punch patty that’s just too tempting to get out of my head? Either way, I came across this and decided yes, this is for me.

{ Best Ever Veggie Burgers – The Kitchn }

And with a title like that, who could turn it down? I made these on a day when I needed to feel that I accomplished something, anything, and with good reason. Let me set the scene…

The day: Saturday after the Michigan Summer Beer Festival in Ypsilanti

The time: directly after seeing Pacific Rim IN 3D IMAX (a great way to turn off your brain for 1.5 hours)

The feeling: not quite human yet

(If you glance below, you can see just how much fun I’m having with my snazzy Bell’s glasses and mini “tasting” cup)

Beer

It was time to roll up my sleeves, chug some water, and get down to non-meat burgers. Wrap some beets in tinfoil, put them in the oven and forget about them for a while.

CookedBeets

Meanwhile over cook some brown rice, and caramelize some onions with cider vinegar (for extra sweetness)

Onions

Find an old bag of oatmeal (that happens to have lots of good stuff like flax seed and whatnot), or just some regular old oats, and give it a nice grind into a flower-like consistency (and doing this you learn that your ALREADY AWESOME immersion blender has an attachment like a mini food processor. Things are comin’ up Vitkin!)


Oats

OatGrind

Now hopefully your beets have been pulled out of the oven, peeled, cooled, and grated and placed in a bowl to await tasty additions. Such additions include black beans–both whole and pulverized WITH PRUNES (oyi my digestive system)–smoked paprika, dijon mustard, cumin, coriander, cooked rice, and sweetly cooked onions. Give her a good and strong mix. Now add that awesome oat flour you just made, and one lone egg.

PattyMix

Now let all the flavors get to know one another intimately in the fridge for a few hours, and then form into patties, and cook until a nice crust forms on each side

PattyCook


Those look good….but I wish they had cheese on them….

Cheese


Hurrah! Now place on your bun of choice (I chose english muffins because I had them, and that way I could have 2), and add some fixin’s

Toppings


Smash together (but not too hard, since we all know homemade veggie burgers tend to be somewhat mushy). Enjoy.

Burger


This recipe made a TON of food. I pattied 6 of them, and that wasn’t even half. I ended up tossing the rest in the skillet together to warm it through (I’m looking at you egg) and to give random places a little crust. I ate this delicious “mush” for the next 4 days topped with everything from avocado and cilantro to corn and tomatoes (and sometimes all of the above). Omit the egg and prepare thine self to WOW your vegan friends with your amazing culinary skillz.

Adapted from { Best Ever Veggie Burgers – The Kitchn }

  • 4 small beets
  • 1/2 cup brown rice (uncooked)
  • 1 medium yellow onion, diced small
  • 3-4 cloves garlic, minced
  • 2 tablespoons cider vinegar
  • 1/4 cup oats
  • 2 (15.5-ounce) cans black beans
  • 1/4 cup prunes, chopped into small pieces.
  • 1 tablespoon extra-virgin olive oil
  • 1 tablespoon smoked paprika
  • 2 teaspoons brown mustard
  • 2 teaspoons cumin
  • 1/2 teaspoon coriander
  • 1 large egg
  • Salt and pepper
  1. Heat the oven to 400°F, wrap the beets loosely in aluminum foil and roast until easily pierced with a fork, 50 to 60 minutes. Set aside to cool.
  2. Meanwhile, bring a 2-quart pot of water to a boil. Salt the water generously and add the rice. Reduce the heat to a simmer and cook the rice until it’s a little beyond al dente. You want it a little over-cooked, but still firm (not completely mushy). This should take about 35 to 40 minutes. Drain the rice and set it aside to cool.
  3. Heat a teaspoon of olive oil in a skillet over medium-high heat. Add the onions and a pinch of salt. Stir the onions every minute or two, and cook until they are golden and getting charred around the edges, 10 to 12 minutes. A few wisps of smoke as you are cooking is ok, but if it seems that the onions are burning, lower the heat. A dark, sticky crust should develop on the bottom of the pan.
  4. Add the garlic and cook until it is fragrant, about 30 seconds. Pour in the cider vinegar and scrape up the dark sticky crust. Continue to simmer until the cider has evaporated and the pan is nearly dry again. Remove from heat and set aside to cool.
  5. Process the oats in a food processor until they have reduced to a fine flour. Transfer to a small bowl and set aside.
  6. Drain and rinse one of the cans of beans and transfer the beans to the food processor. Scatter the prunes on top. Pulse in 1-second bursts just until the beans are roughly chopped — not so long that they become mush — 8 to 10 pulses. Transfer this mixture to a large mixing bowl. Drain and rinse the second can of beans and add these whole beans to the mixing bowl as well.
  7. Use the edge of a spoon or a paper towel to scrape the skins off the cooled roasted beets; the skins should slip off easily. Grate the peeled beets on the largest holes of a box grater. Transfer the beet gratings to a strainer set over the sink. Press and squeeze the beet gratings to remove as much liquid as possible from the beets.
  8. Transfer the squeezed beets, cooked rice, and sautéed onions to the bowl with the beans. Sprinkle the olive oil, brown mustard, smoked paprika, cumin, and coriander over the top of the mixture. Mix all the ingredients until combined. Taste the mixture and add salt, pepper, or any additional spices or flavorings to taste. Finally, add the oatmeal flour and egg, and mix until you no longer see any dry oatmeal or egg.
  9. Cover the bowl with plastic wrap or transfer the mixture to a refrigerator container, and refrigerate the burger mixture for at least 2 hours.
  10. Heat a cast-iron skillet over high heat. Add a few tablespoons of vegetable oil to completely coat the bottom of the pan.
  11. Form patties and cook as many as will fit without crowding. Cook for 2-4 minutes per side (or until you see a nice crust).

Chilled Corn Soup with “Lobster” Salad

2 Aug

Now that I’ve eaten my way through my savings with my constant intake of Burrata I knew I had to make some cutbacks for this refreshing and SUMMERY dish

{ Chilled Corn Soup with Lobster Salad – Bon Apetit }

FInal1

Yum. What about that doesn’t sound good? Nothing, that’s what.

Let’s go ahead and jump into a side note: On August 1 John and I celebrated our 1 year anniversary of moving to Ann Arbor, and I had a lot of different feelings about it. Has it already been a year? Why don’t I know more people yet? What would have happened if I spent the last year in Kalamazoo? Am I a better person? Well…let’s not get crazy. I feel I have definitely gone through some major changes over the year I’ve spent in my new home, the biggest of which I decided to start a blog about food, AND I ACTUALLY STUCK WITH IT. It was something I always wanted to do, and in the face of change, I decided to embrace and run (with it). Upon this retrospection, I looked back through some of my old posts, and yowza, there are some t-e-r-r-i-b-l-e photos on here, but it’s to be expected. I feel so amped at my portfolio of dishes, and I can’t wait to try some stuff that’s totally different (and I still need to use my canning system before Summer is over or else there goes $70 and prime shelf space).

Now I enjoy splurging on the occasional indulgent ingredient (Burrata, $25 Scallops, etc) however I just couldn’t bring myself to buy real lobster for this dish, especially when it’s not the “main event” (I could have said Maine, but I went the high road). I marched over to the seafood counter, and took a slight left, and headed to the prepared “fish” area…the area that holds the pickled and smoked items that come in jars and I was able to locate Krab (imitation crab, obvs). A mere 4 inches lower laid what I came for: imitation lobster (or what I like to call [k]lobster, pronounced clobster). It wasn’t my proudest moment, but man that $3.50 sure was nice to see…

First things first, let’s do some a-choppin

Chop


Sautee onions and garlic, then add your 6-cobs-worth of corn and heat until corn starts to soften.

CornOnions


Meanwhile let’s make this soup the corniest it can be by making….corn stock! Take yer cobs (or bones of the corn) and put them in a pot with extra celery, onions, onion skins, random mushrooms you found in the back of your fridge, a few carrots…..really whatever you have laying around. Cover the whole thing with water, bring to a boil, then turn down heat to a low boil for about an hour. Strain and reserve liquid for future corn-ings (or for this corn soup).

CornStock

Back to the corn and onions. Add fresh herbs (the recipe calls for thyme, but I like dill, and had dill, so I used dill) and 5 cups of HOMEMADE CORN STOCK or water, and bring to a rolling boil for about 10 minutes, or until your corn is all cooked.

SoupCook

Now we blend! Using my handy lovely sexy immersion blender, I whipped everything into a nice creamy puree, and took a step I’ve never taken before in soups: straining through a fine-mesh. I normally just keep all the bumps and lumps in the soup because hey, extra fiber, but I wanted something silky so I took that extra step. And guess what, corn soup puree doesn’t go through a fine-mesh sieve easily, so I had to hold it while Max kept whipping things around to find holes (yes yes I know how it sounds). But after what seemed like calendar months, the liquid was finally separated from the corn mush.

CornMush


I was feeling ambitious, so after I put the soup into the fridge to chill, I starting grabbing baking ingredients (flour, baking soda, blah blah) and I was intent on using this mush to make some sort of savory corn muffin. I lost steam after about 55 seconds because the TV was calling my name, and I had been neglecting it on account of all the corn stock. So I just had some spoon fills and let it go to waste like the asshole that I am.

On to the [k]Lobster salad! Whisk together lemon juice, shallot, and dijon. Slowly add olive oil, and season with salt and pepper. Add your celery leaves

CeleryLeaves


[k]Lobster and dill. Mix everything together.

KlobsterSalad

Guess what….[k]Lobster isn’t bad…it’s actually pretty good. WHO KNEW. Give this salad a pop in the fridge to crisp up a bit, then make some bowls, ladle your chilled silky smooth corn soup on in, and top with your fake seafood salad.

Final


I’m not going to lie to you. This soup was DA BOMB. The corn gave a distinct sweetness to the soup, while the dijon in the salad added just the right amount of bite to everything. The dill and celery leaves offor a refreshing flavor, and the [k]Lobster is just strutting about like he was actually $12/lb, which just adds the right amount of cockiness to the whole thing. Claws up!


Adapted from { Chilled Corn Soup with Lobster Salad – Bon Apetit } 


Corn Soup

  • 3 tablespoons unsalted butter
  • 2 tablespoons olive oil
  • 1 large onion, chopped
  • 1 garlic clove, finely chopped
  • 6 cups corn kernels (from 6 ears)
  • Kosher salt, freshly ground pepper
  • 2 sprigs thyme
  1. Heat butter and oil in a large pot over medium-high heat. Add onion and garlic and cook, stirring often, until softened and beginning to brown, about 5 minutes. Add corn; season with salt and pepper. Cook, stirring occasionally, until corn is softened and beginning to brown, 6–8 minutes.
  2. Add thyme sprigs and 5 cups water to pot. Bring corn mixture to a boil, reduce heat, and simmer until corn is very soft, 10 minutes longer; discard thyme sprigs.
  3. Working in batches, purée corn mixture in a blender until smooth (or use an immersion blender in the pot). Strain through a fine-mesh sieve into a large bowl, pressing on solids; discard solids. Transfer soup to a large bowl, cover, and chill until cold, at least 2 hours.

Lobster Salad

  • Kosher salt
  • 1 Pack [k] Lobster imitation
  • 1 small shallot, finely chopped
  • Juice of 1/2 fresh lemon
  • 1 teaspoon Dijon mustard
  • 2 tablespoons extra-virgin olive oil plus more for drizzling
  • Freshly ground black pepper
  • 3 tablespoons coarsely chopped celery leaves
  • 1 tablespoon chopped fresh dill
  • Salt and Pepper
  1. Whisk shallot, lemon juice, and mustard in a medium bowl. Gradually whisk in 2 tablespoons oil; season dressing with kosher salt and pepper. Add [k]lobster meat, celery leaves, and dill; toss gently to coat. Cover and chill until cold, about 1 hour.
  2. Divide soup among bowls and top with lobster salad. Drizzle with oil and season with sea salt and pepper.


How Much of a Blowhard am I: Is Ignorance Bliss?

29 Jul

You may remember about a month ago I had a guest post from my Deutsch Freund Oliver, AKA The Winegetter, and he went into detail about the lack of good bread here in the U.S.

Oliver and his lovely wife are currently traveling throughout Southeastern Asia (suck it, man) so in order to keep his blog up to date he has an awesome line up of guest bloggers updating posts while he’s gone. Sidenote: I’ve been watching his travels through what he’s posted online, and I can honestly say I’m IN RAGE with envy. He’s been traversing country after country, and the furthest I have traveled in that time is heading down to Indiana for a weekend. Ahhh….wanderlust….she is a fickle temptress. 

This was from a 2007 trip to Lithuania. Earlier that year we found out my father had surviving family members living there so naturally we had to go check it out. We were on our way to Israel to visit family after, and so we packed for the middle east. This was Eastern Europe, so naturally it was overcast, rainy, and much colder than we thought (think women in head wraps playing the violin around trash cans of fire....not really)

This was from a 2007 trip to Lithuania. Earlier that year we found out my father had surviving family members living there so naturally we had to go check it out. We were on our way to Israel to visit family after, and so we packed for the middle east. This was Eastern Europe, so naturally it was overcast, rainy, and much colder than we thought (think women in head wraps playing the violin around trash cans of fire….not really)

Anyhoo, I had my own opportunity to go on a rant for his blog so I decided to explore the topic of wine and beer “snobs” (read: me sometimes). Without further adu, I present…

Erica Vitkin: Is Ignorance Bliss?.

And while you’re there, take a look around. There are some great guest posts in this series, and all of Oliver’s original content is truly insightful and makes you thirsty for a glass (or bottle) of wine.

Burrata: My New Obsession

25 Jul

You know when there’s something you love, like, really and truly love, and then you find out there’s an even BETTER version of it out there (like meeting your girlfriend’s sister…hi-O). That happened to me this past weekend. My world was rocked. Up was down, left was right, Olive Garden seemed like a good idea…it was madness.

As a fan of cheese, there are few things in the world better than a big ball of fresh mozzarella (amirite). But wait a second, there’s this thing out there called Burrata, an even sexier version of fresh mozzarella. It’s a ball that is a “shell” of fresh mozzarella wrapped around a mixture of mozzarella and fresh cream…meaning it’s a ball of mozzarella with a creamy gooey middle (think not quite set egg whites). It’s almost vulgar. I’m going to land in the poor house with this new obsession. I saw two different recipes in August’s Bon Appetit featuring Burrata, and it occurred to me that I didn’t actually know what it was. I ventured over to Plum Market because they have the BEST cheese counter! Really great, high quality selection, they’ll cut down any cheese to the amount you need, and the people are so knowledgeable (and yet being cheese experts don’t weight 3000 pounds..how do they do that?). Their beer selection is also pretty dynomite. After learning why I should spend $9.99 on a small ball of Burrata, I was on my way to create this tasty sensation:

Salad

{ Pickled Nectarine Salad with Burrata – Bon Appetit }

I’ve been talking about how much I love Summer foods, and this recipe completely embodies that. My mom was in town (to go wedding dress shopping) so I thought this would be the perfect thing to start our day. But first, the cheese

Cheese

Isn’t that cute? It’s wrapped up like a neat little package. What lies within…?

Buratta1

Ah, pizza dough-looking cheese. Alrighty, off to a good start. Here’s the main part of the salad: cutting up nectarines, and then letting them soak in white wine vinegar, sugar, and red onions. Yep, the rest is just “put on plate”

MomChop

With my expert helper (Mary Lu) on hand, we chopped up those bad boys, let them rest in the vinegar, and then chugged some water (because it was still like 90 outside)

Chop

Lucky for me she has a generous garden, so she brought up some fresh Basil. The recipe calls for mint, but hey, what Summer foods does Basil NOT go with?

Basil

Now slice up your pornographic cheese and “put on plate”

Buratta

Toss some arugula and basil with the drained-marinated nectarines and onion. Add some of the vinegar mixture (enough for a light dressing), and “put on plate”. Drizzle some fresh olive oil over, and top with salt and pepper.

Salad

Sweet Jesus, this salad was amazing. I loved every second of inhaling this, and I am honestly shocked that in the 5 days it’s been since I made this I haven’t made another one. Just….bravo. And of course, my Burrata problem has already led me to purchase more (it was $12.99 too, but I had a 20% off coupon, so all’s not lost).


Adapted from { Pickled Nectarine Salad with Burrata – Bon Appetit }

  • 2 nectarines, thinly sliced
  • 1/4 small red onion, thinly sliced
  • 1/4 cup white wine vinegar
  • 1 teaspoon sugar
  • Kosher salt, freshly ground pepper
  • 4 cups torn arugula
  • 1 cup fresh basil leaves
  • 2 tablespoons olive oil plus more for drizzling
  • 8 ounces burrata or fresh mozzarella, cut into big “globs”
  1. Toss nectarines, onion, vinegar, and sugar in a large bowl; season with salt and pepper. Let sit 10 minutes.
  2. Pour off pickling liquid from nectarines and onion, reserving liquid. Add greens, basil, 2 tablespoons oil, and 2–3 tablespoons reserved liquid; toss to combine.
  3. Place burrata on plates, top with salad, and drizzle with oil. Season with salt and pepper.


Tiny Portal

Awkwardly walking through life's little doors

Go Jules Go

Author. Blogger. Chipmunk enthusiast.

Things that we like

Beer. Sports. Food.

Modern Day Forager

All Roads Lead to Food

Reading Runner Girl

Reading. Running. & Other Things.

Aerogramme Writers' Studio

Books and Writing | News and Resources

The Tomato Tart

But check your lease, man. Because you're living in Flavor Country.